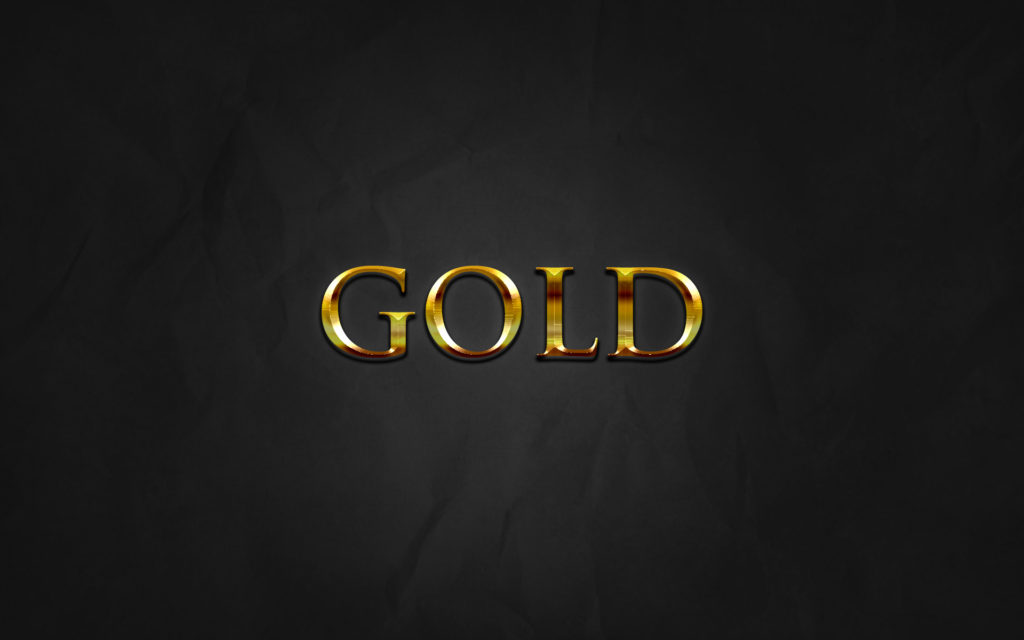
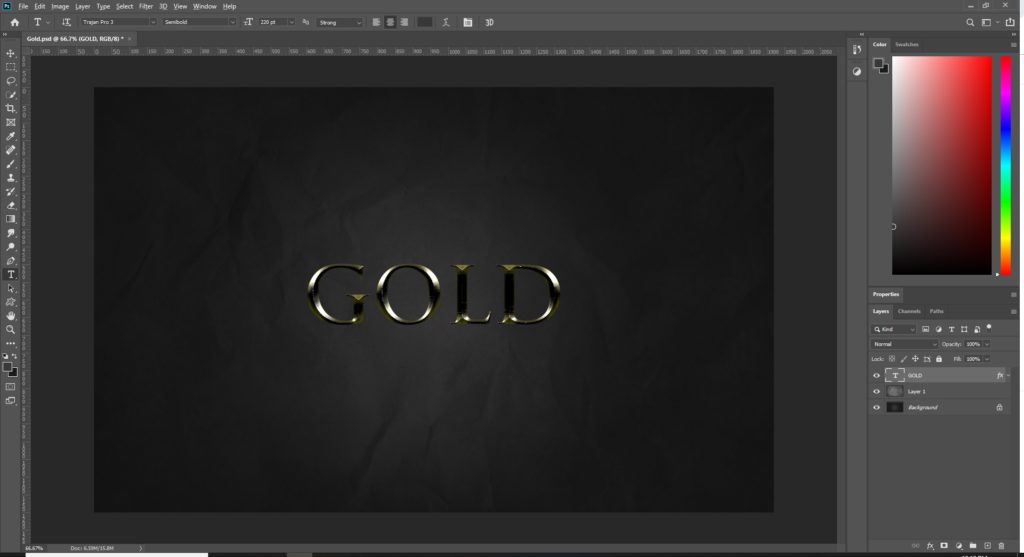
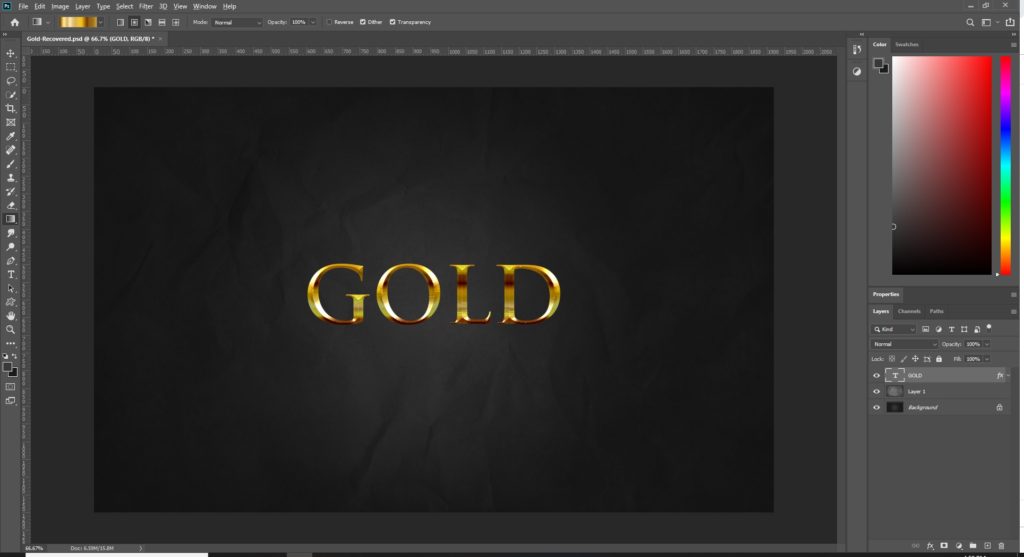
When I first started using Photoshop I found the best way to learn was by following tutorials. There are so many ways to do things within Photoshop it can be overwhelming so to follow someone’s guidance is a great way to get to grips with the tools and their capabilities. One of the first tutorials I followed was to create a Gold text effect. Very easy to follow and it will expose you to some great tools and techniques which you can take on in to other projects. The image above is the final output and you can achieve this by following the steps below
Step 1 – The Background
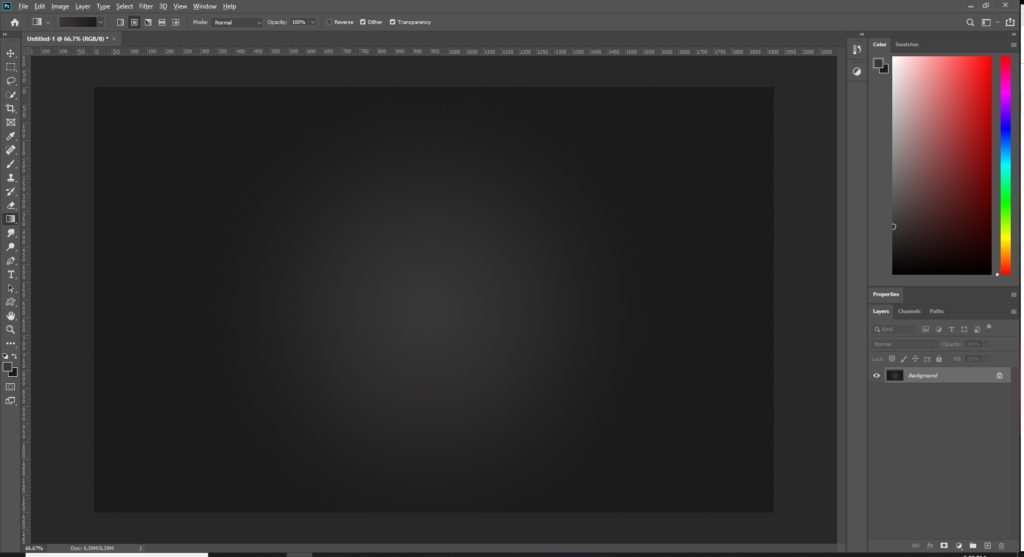
You can never underestimate the importance of backgrounds when creating designs in Photoshop. Being able to create stylish and elegant looking backgrounds is what turns good designs in to great designs. For this design.
Select a foreground color of #383838 and a background color of #1b1b1b
Using the Gradient tool (G) create a radial gradient by dragging upwards from the center of the screen
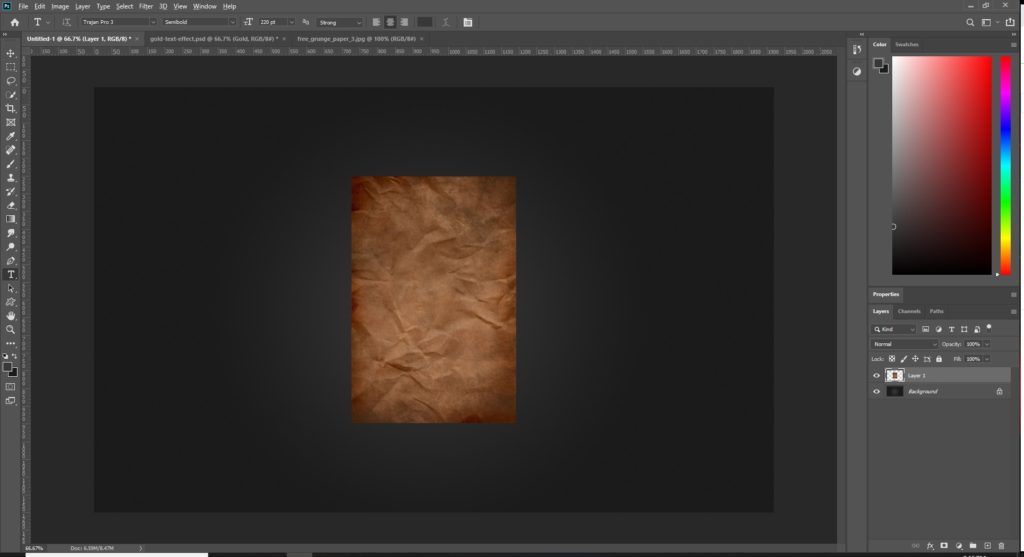
Next we can make the background really pop with this very simple technique.
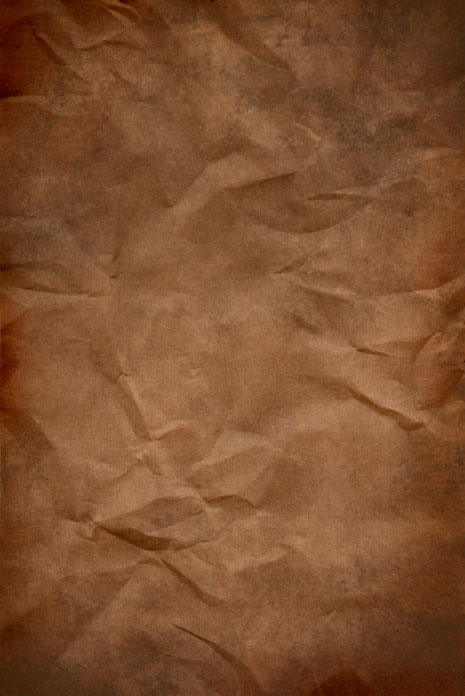
Import a “crumpled paper” image in to your design
Note: You can download this file Here
Transform the layer (Ctrl+T) then rotate & resize to the entire width of the image.
Desaturate which essentially means turn to black and white by selecting Image > Adjustments > Desaturate from the menu or select (Ctrl+Shift+U)

Set the blend mode to overlay and set the opacity to about 45%
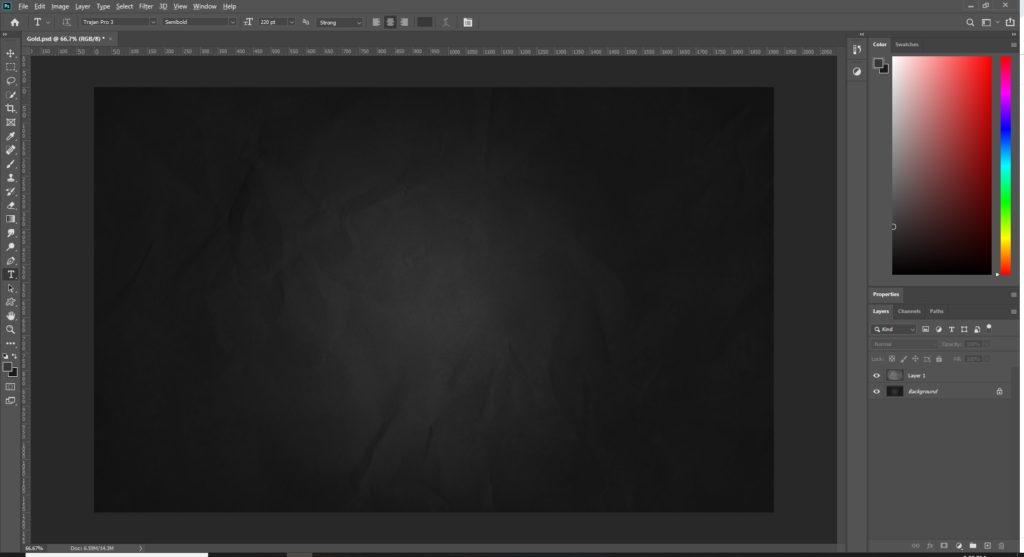
We now have a very elegant looking background for our text. This technique can be used with a wide of textures to give great depth to your backgrounds.
Note: Like a DJ sampling all sorts of sounds, take pictures of all textures you can think of to make effective backgrounds (grass, soil, sofa cushions, rocks etc.) – experiment and you might just find something you like
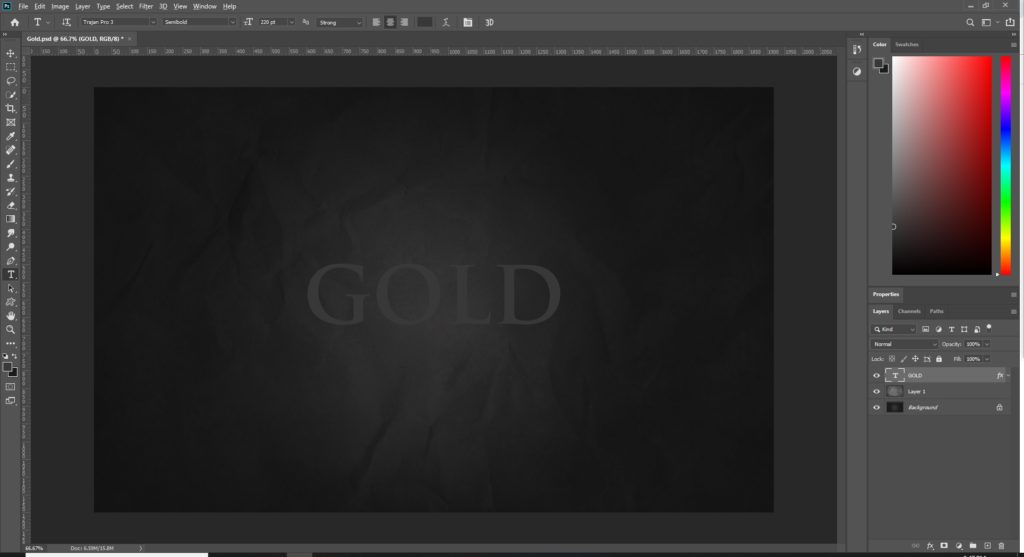
Using a font of your choice, create a text layer and type “GOLD” – To get the best out of this effect, I recommend using a serif font. In this image I have used the Trajan Pro 3 font. The color of the font does not matter too much as we will be altering this with blending options
Now we can start applying blending options to completely transform the text and achieve the Gold effect.
Note: Feel free to copy the exact settings but do experiment with the values to see what impact it has. Remember that the real goal is to learn what each tool does so that you can build your arsenal for future projects
Right click the text layer and select blending options. The first option to enable is Bevel & Emboss using the settings outlined below
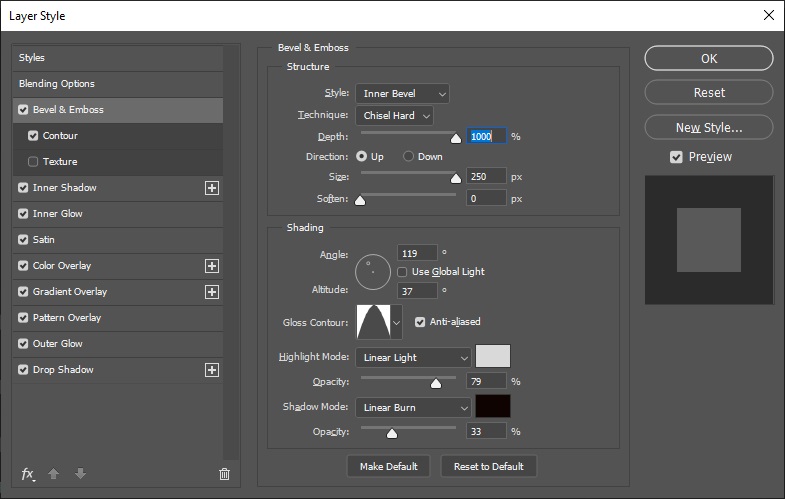
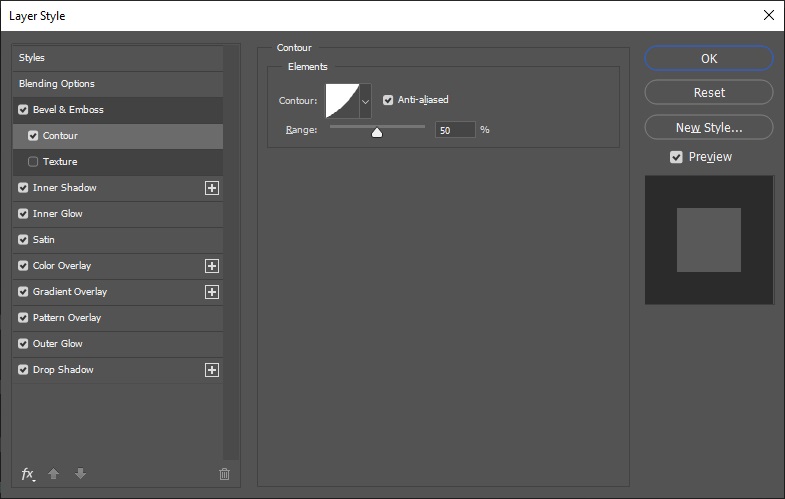
Add contour settings
Quick spot check…With the 2 settings applied above, your text will currently look like this

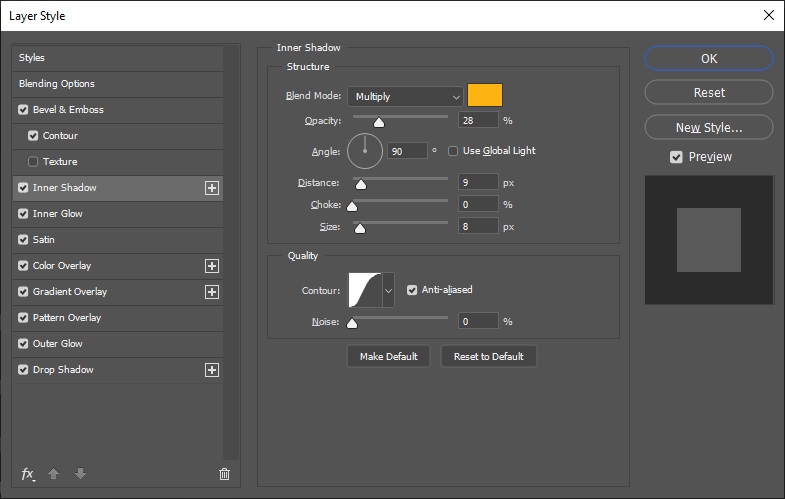
Next add Inner Shadow
And Inner Glow
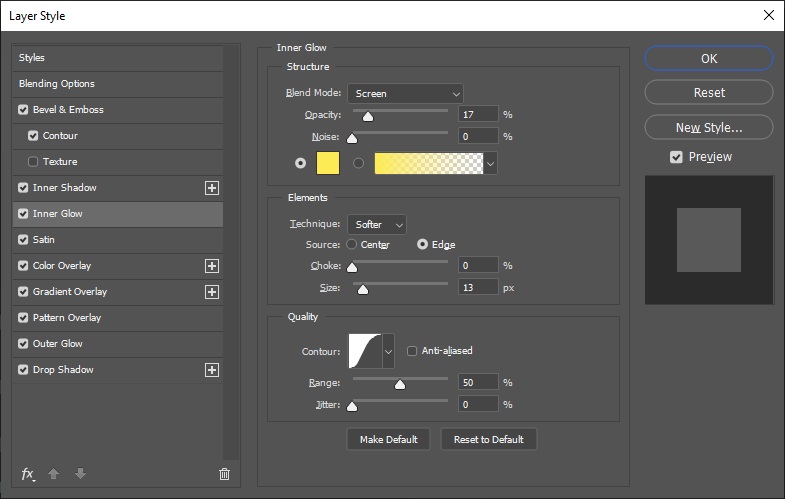
Note: For the yellow color, use the color picker to select a shade of yellow which you think looks like bright gold
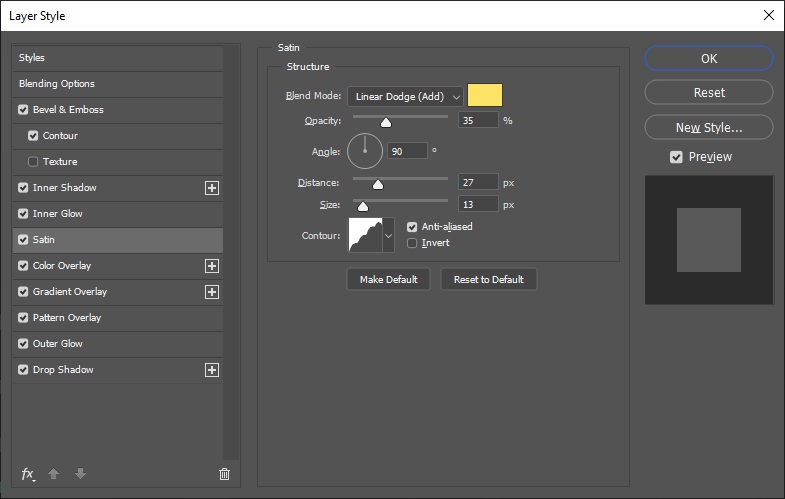
Next enable satin
Another spot check and this is how your image should be looking
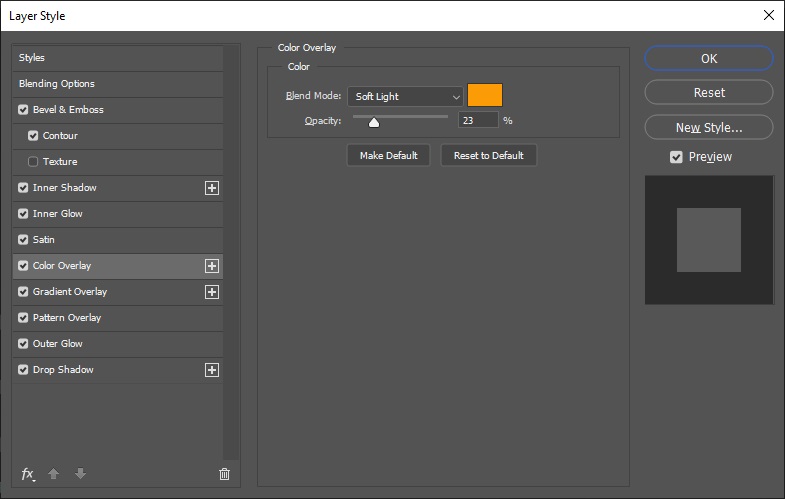
Back to the blending options, and we can now add a color overlay
And now the Gradient overlay
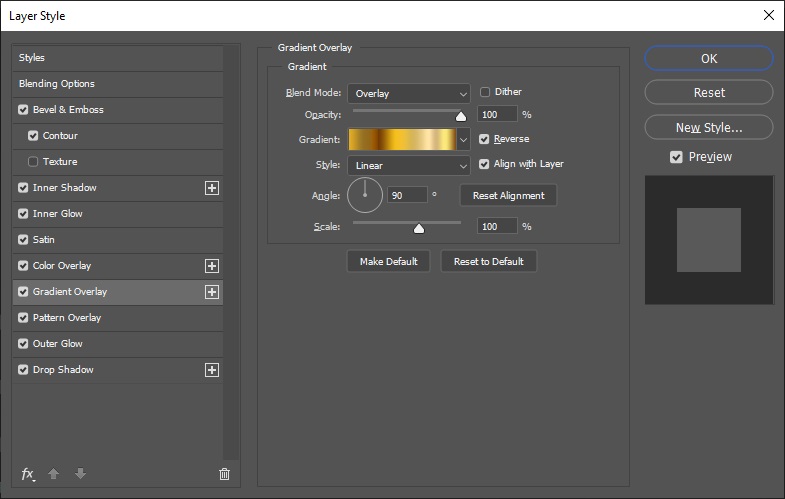
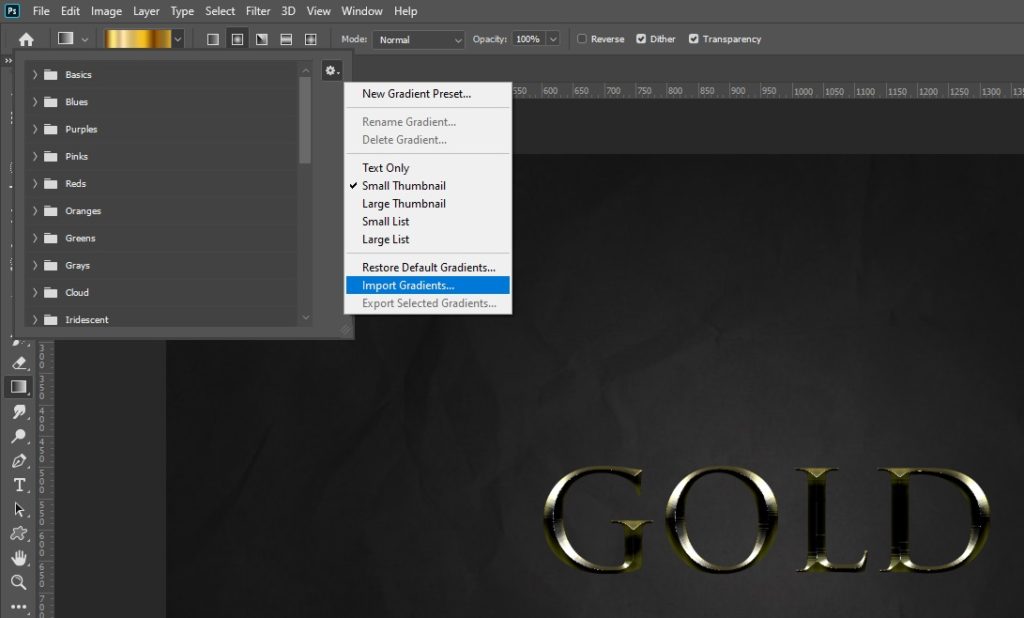
Note: The gradient overlay is where the magic really happens in this effect. The gradient I have used is a custom gradient which you can download here. Once you download the gradient you can import it (see below)
Another spot check and your text should now be starting to take shape and look like the following
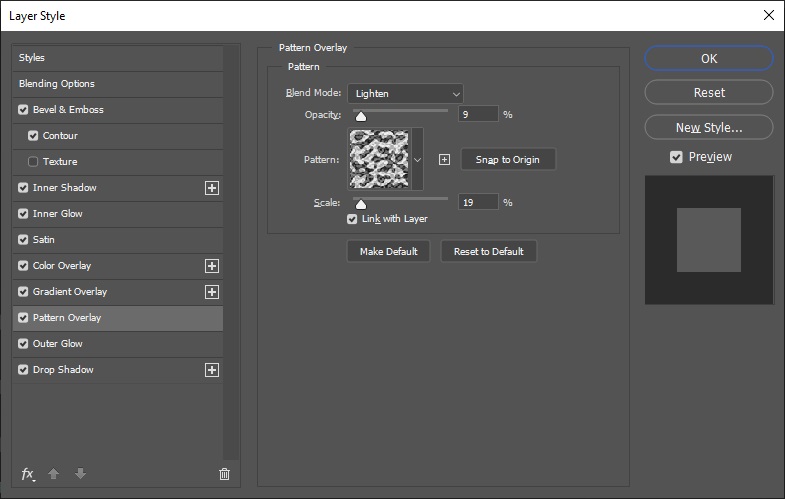
The final few blending options are Pattern Overlay
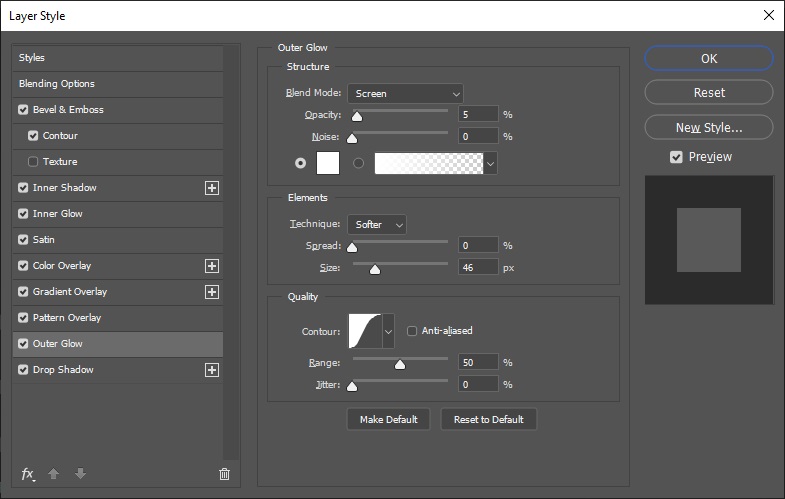
Outer Glow
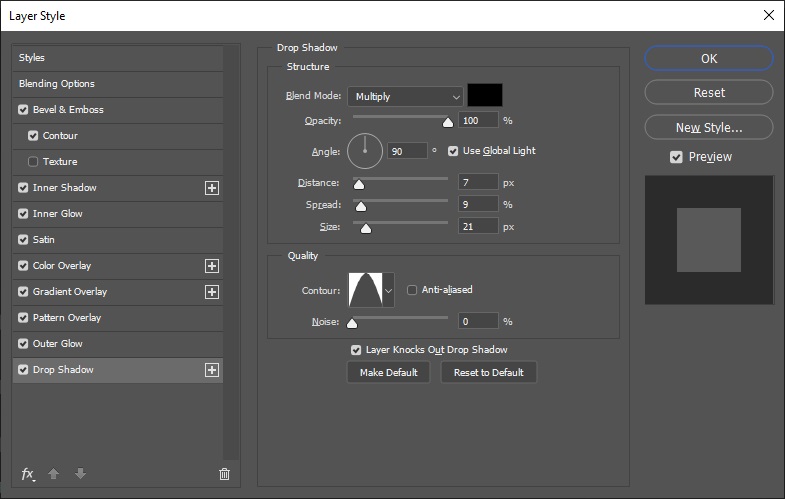
And finally Drop Shadow
That is the end of this tutorial and I hope that you were able to follow along and create this effect yourself. There is nothing worse than seeing a great effect and being unable to follow along. Don’t forget to download the crumpled paper background as well as the gradient effect.
Thank you for following and go create something!