In my last video we looked at how to cut out pet hair in Photoshop. Using similar principles we can take a look at the tools and techniques for cutting out hair in Photoshop. I have been using Photoshop for quite a few years now. I will admit that I never really knew how to cut out hair properly until I learnt this method so let’s dive in…
Before we open our image for this tutorial it is worthwhile setting a few expectations when cutting out hair in Photoshop
- Not all hair can be cut out – Sometimes the background is too similar to the hair color that it is practically impossible to cut the hair out and look authentic.
- You may need to create a custom brush and create your own hair
- Remember that not everyone will know what the original image looks like – Create an authentic looking image instead of trying to achieve a pixel perfect cut out
With this in mind let’s open the image. At first glance it may appear very difficult to cut out the hair in this image but using this method it will be very simple – Honest!
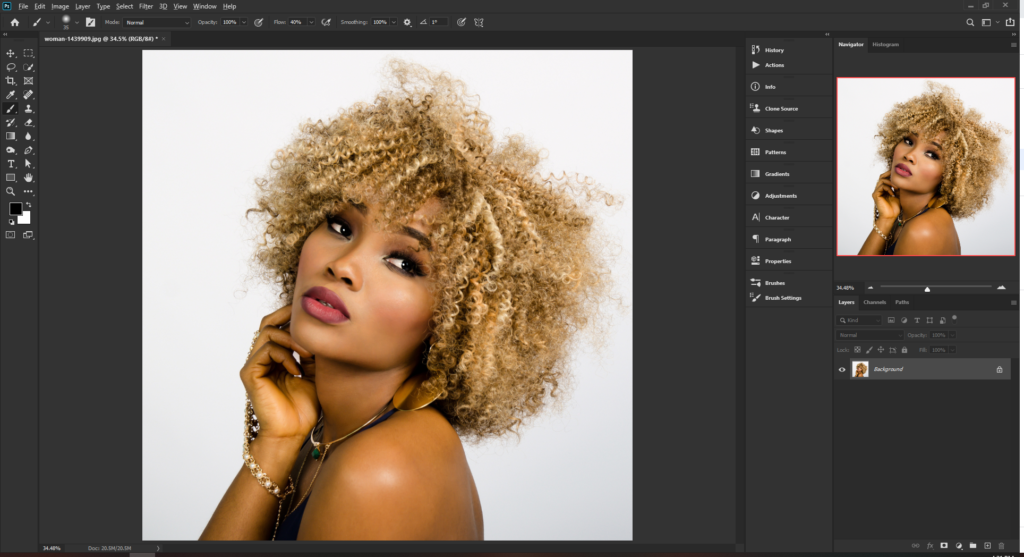
Step 1 – It’s all about the selection
When cutting out hair there are multiple tools and methods for you to use. The trick is to get so familiar with each tool and method so that you can just look at an image and know which one will be most effective. We can take a look at a few methods in this tutorial but typically my process goes in this order:
- Use channels to make hair selection
- Select subject tool
- Pen tool
- Quick selection tool
We will be using channels to make this selection but first let’s take a look at the other tools so we can understand why channels are most effective – I assure you that once you learn this method, you will not go back!
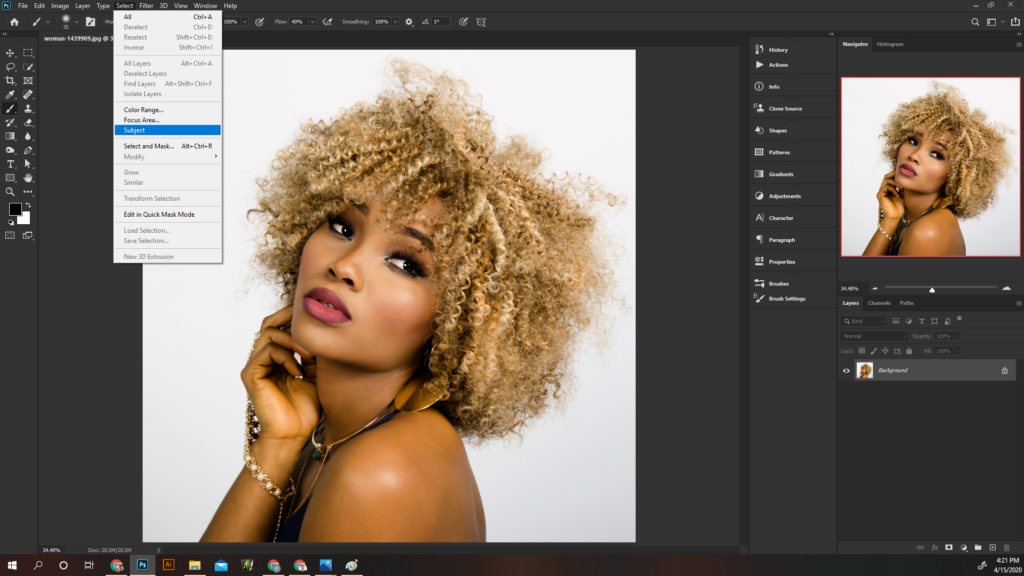
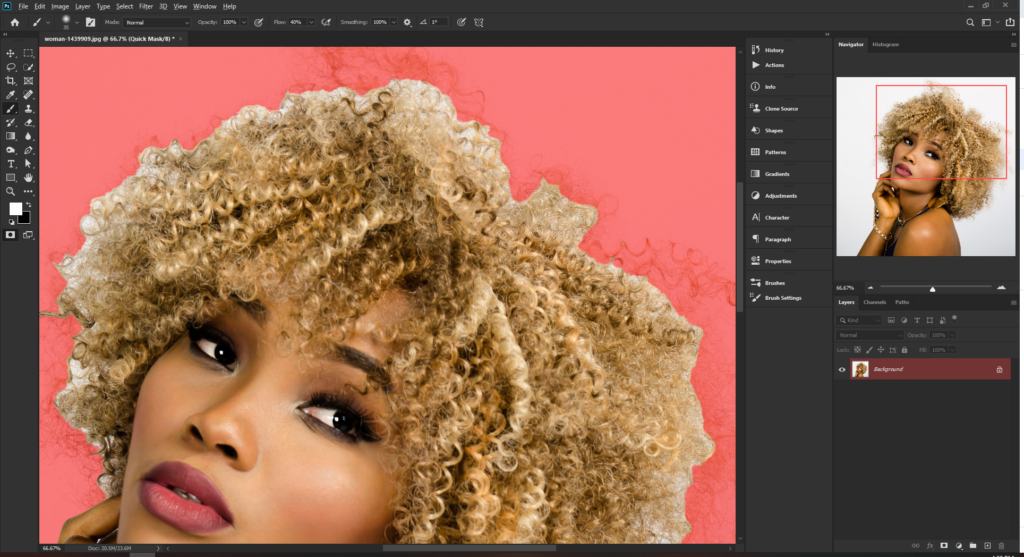
The select subject tool has done an ok job but applying a quick mask (Q) to make it more visible you can see that the fine hairs around the outside have not been captured. When using quick masks the areas in red will not be visible. Trying to fix this manually will be a nightmare and getting a good result would take a very long time
The quick selection and pen tool will provide similar results so we will now explore the channels. Every image in photoshop is made up of channels. There is a Red, Green and Blue channel which all come together to make the image. Go to the channels window and select each channel thumbnail in turn
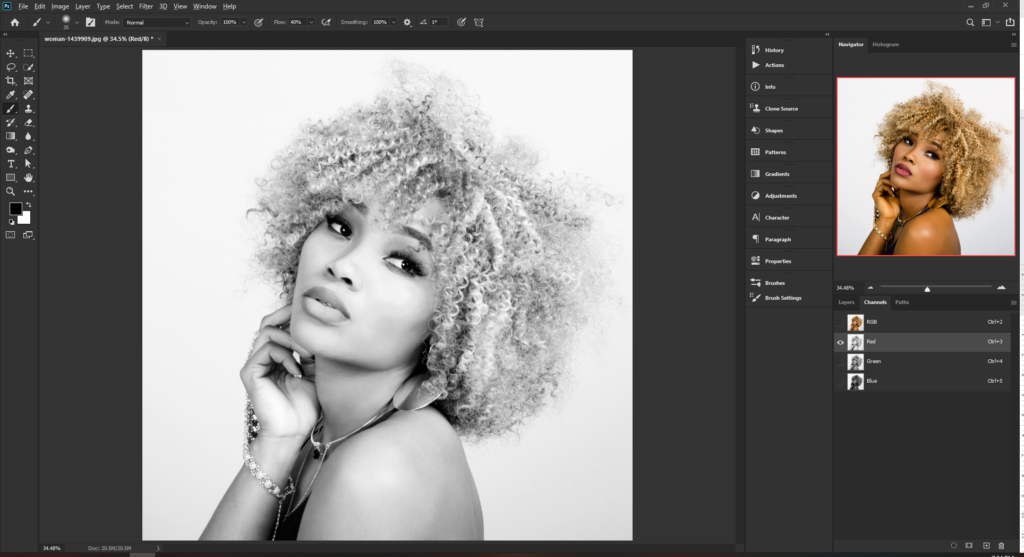
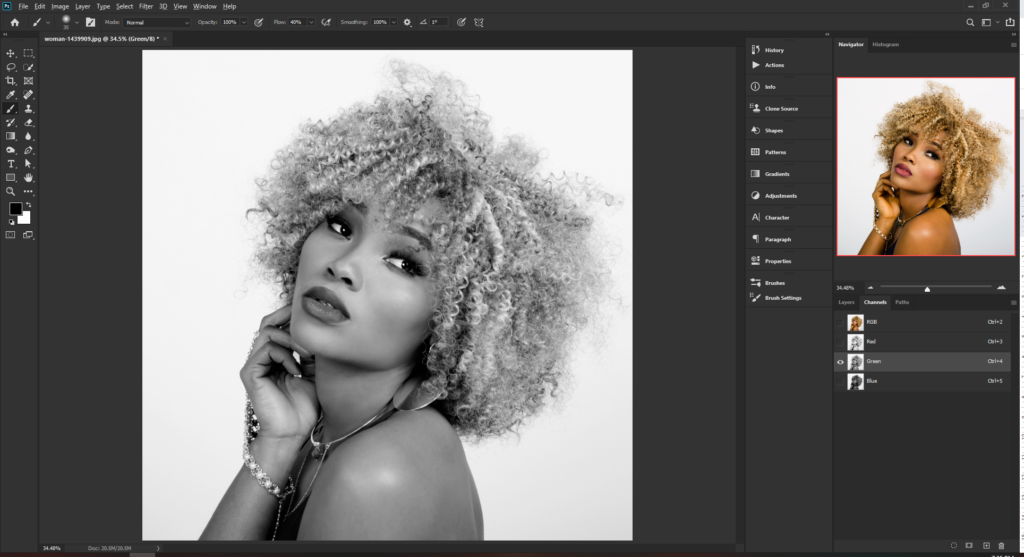
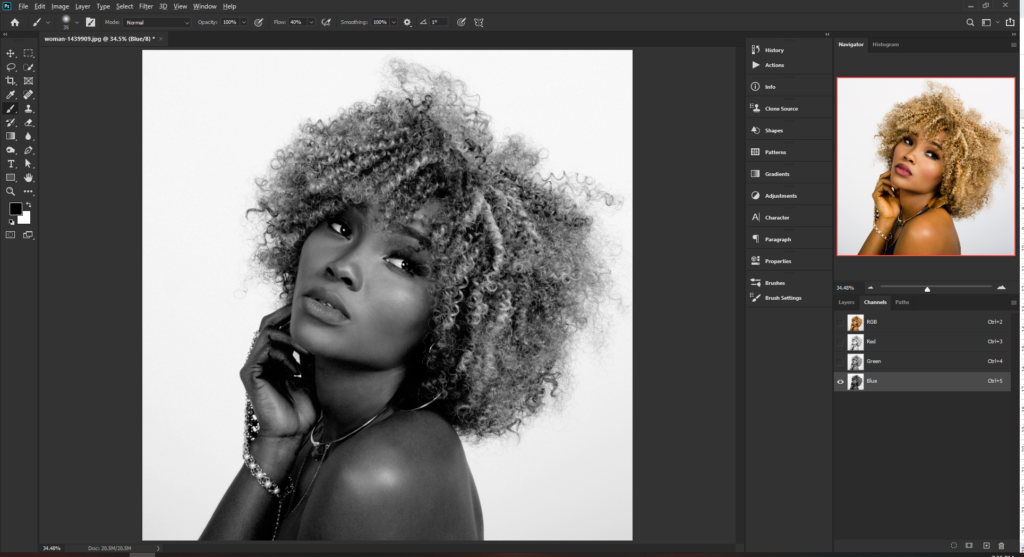
When using channels to cut out hair we are looking for something quite specific. We are looking for the channel which has the most contrast between the subject and the background. Once we have identified the channel to use we can then enhance the contrast using levels.
In this image the highest contrast is the Blue level. Make a copy of the Blue level by right clicking and selecting duplicate channel (press ok). Alternatively, drag the channel to the new layer icon at the bottom of the screen. This step is important because iIf you do not make a copy you will be editing the original image and we never like to do that. It will break things.
With the duplicate layer selected, press Ctrl+L to alter levels of the duplicate layer. Here we are trying to make the whiter parts of the image even whiter and the darker parts even darker. Use the input levels sliders to achieve this and press ok
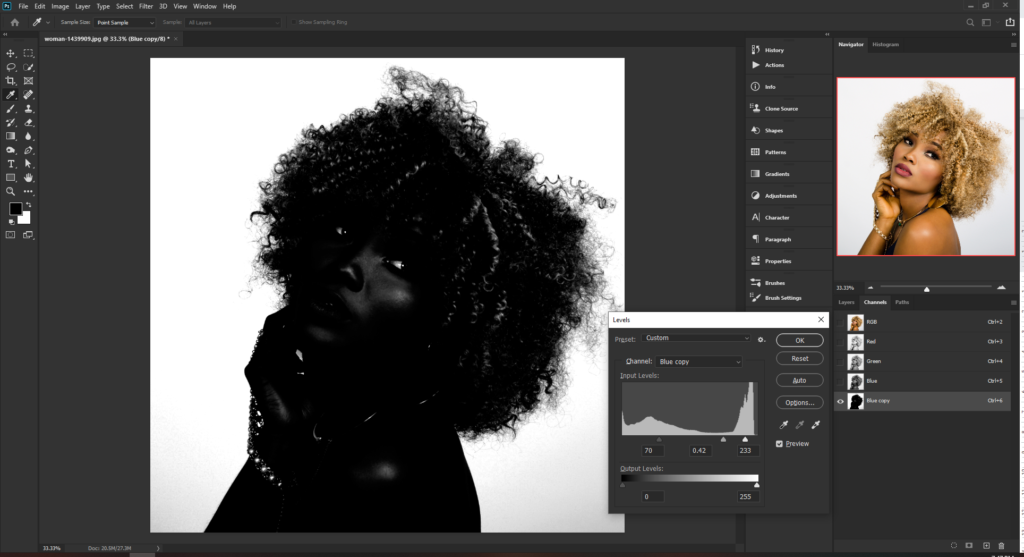
Now here is the great part about channels, if you hold Ctrl and click on the channel thumbnail it will select the lightest parts of the channel. In this case we want the darkest parts of the image so we need to click Select > Inverse or press keyboard shortcut Ctrl+Shift+I. This will now have the darkest parts of the image selected so go back to the image layer, select the layer and with the selection from the channel loaded, press Q to see the quick mask.
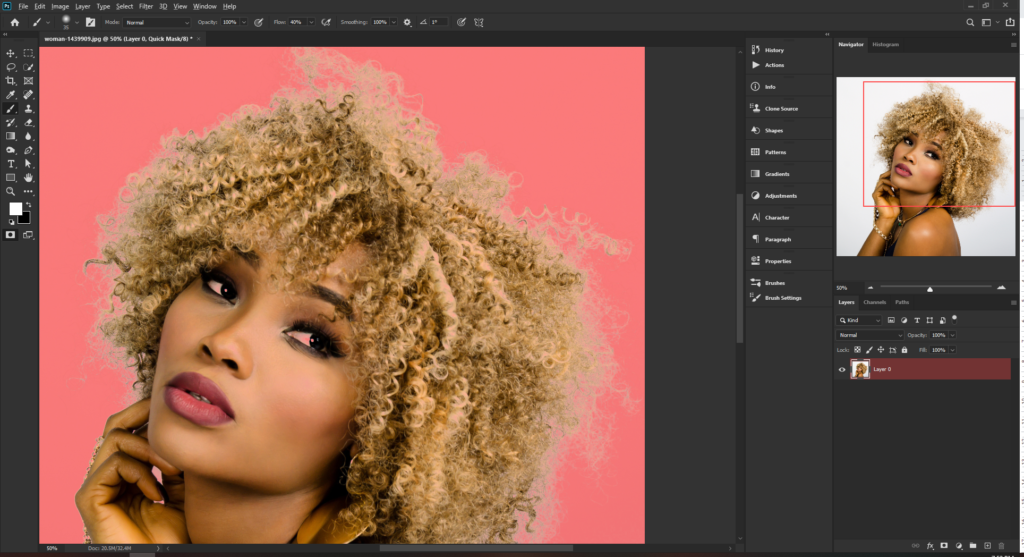
Already you can see the huge difference in the amount of detail which has been selected. We want this detail so press Q again to hide the quick mask and press the layer mask icon to create our mask.
Step 2 – Refining the Layer Mask
Now we are working with the layer mask we must remember a few things and few helpful commands which will help you out
- Layer masks allow you to hide and reveal areas of a layer making the contents below visible or invisible
- To make areas of your layer visible, paint white on the mask
- To hide areas of your layer, paint black on the mask
- Holding Shift while clicking the layer mask thumbnail will disable the mask
- Holding Alt and clicking the layer mask thumbnail will show you what the mask looks like
Holding Alt and select the layer mask thumbnail to see what the mask looks like
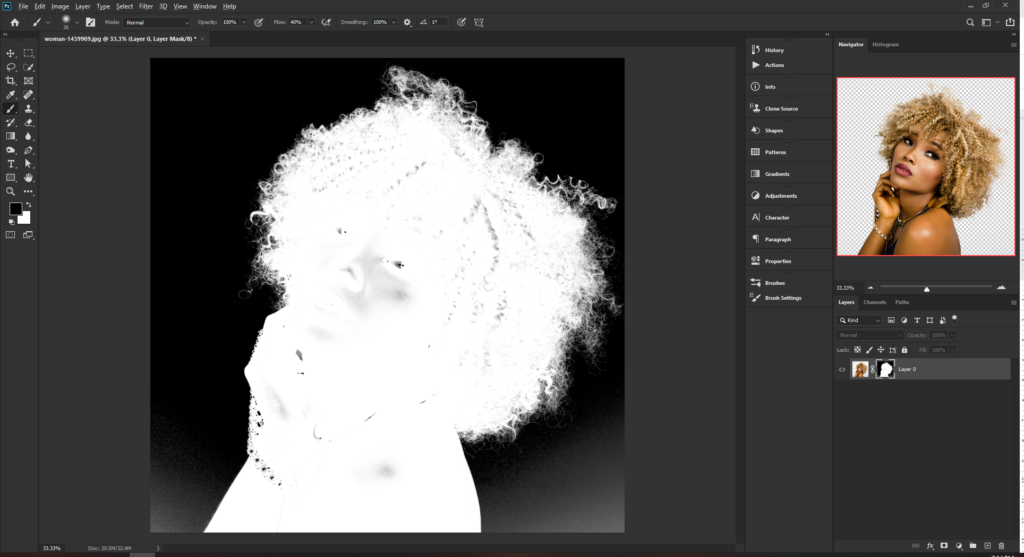
We want to see all of the subject so everything on the inside of the edge should be bright white. Use a soft brush to carefully do this.
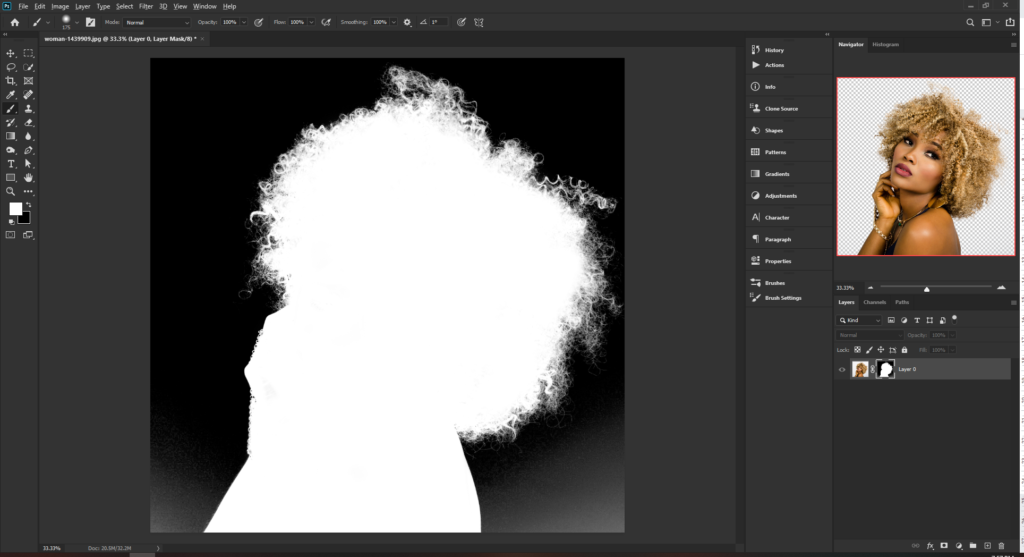
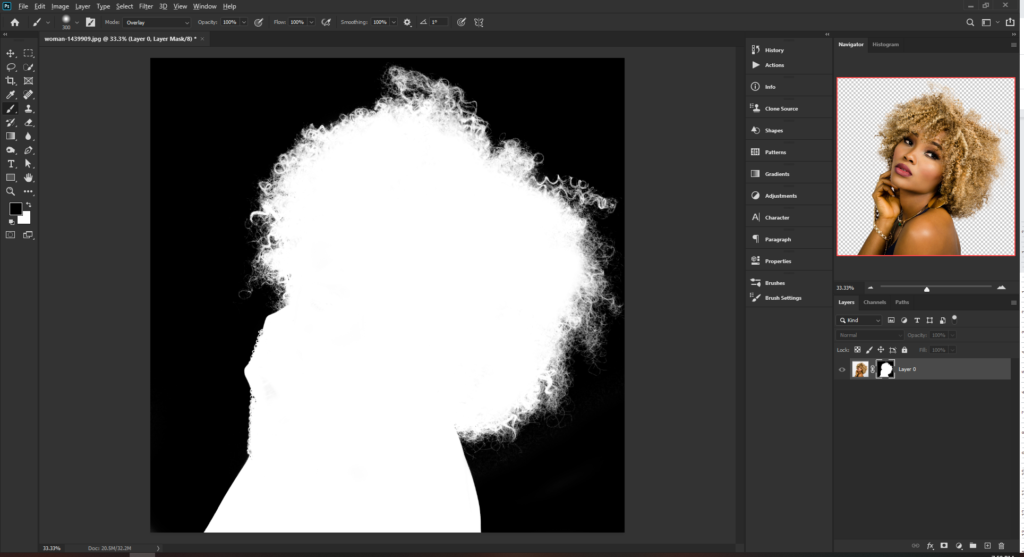
Now here is a great tip which I picked up from watching one of the amazing Phlearn videos. Set the brush mode to overlay and begin to paint over the mask. This will make the dark areas darker and the white areas whiter. This is perfect for the tricky areas in the bottom corners.
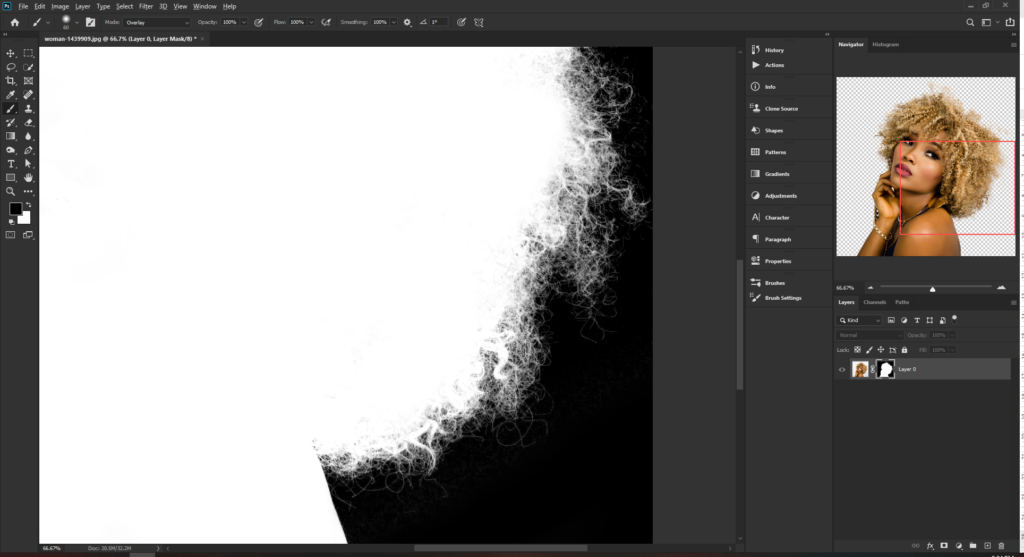
Zoom in to the layer mask and take a look at how intricate this layer mask is now. This is why the channels are so good for hair selection. Creating this without channels would take ages!
Coming back out of our mask and looking at the image we can now place a solid color background behind our subject to check out how things are coming along.
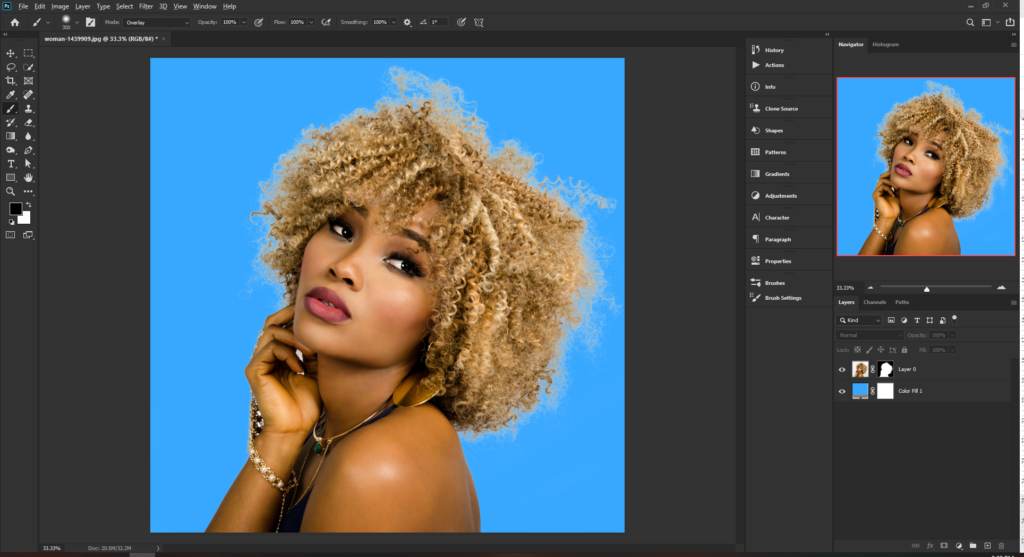
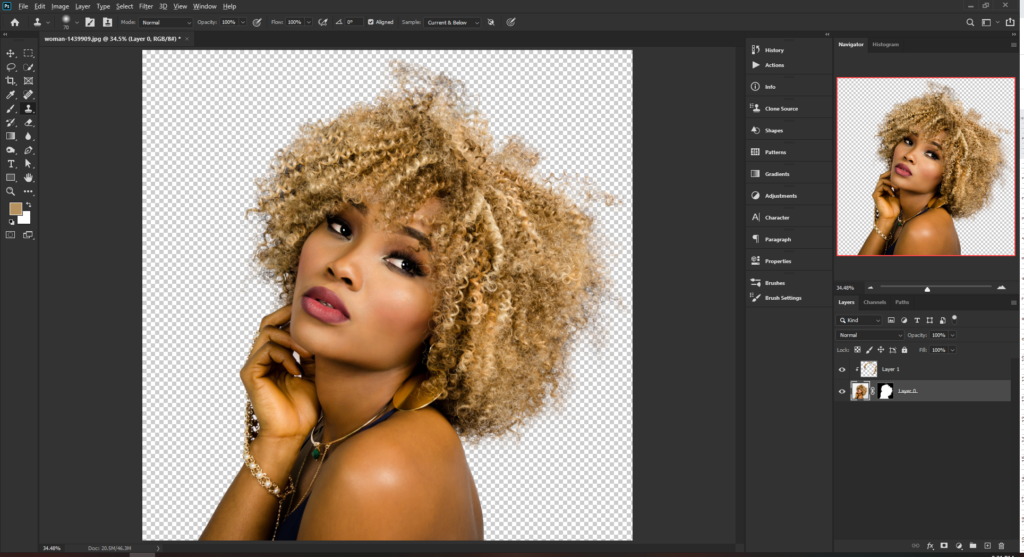
It is looking pretty good but there are areas at the edge where the color is a little saturated. This is called fringing but it is not a major issue. We can solve this by creating a new layer and turning it into a clipping mask. This will ensure that whatever we paint on the new layer, will be restricted to the confines of the layer below which just happens to have our channel selection applied as a mask.
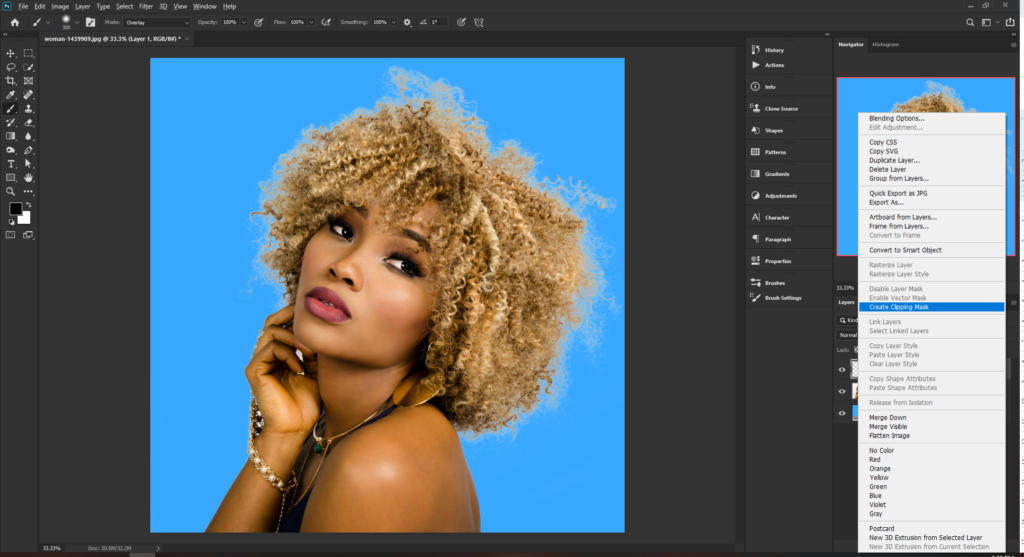
Now that we have this layer we can do a few things to complete the image. We can take the brush and sample areas of color at the edges and paint. Something we can also do is to use the clone stamp tool and fill this clipped layer with cloned hair from within the image. This method can be a little tricky but once you get the hang of the tool you will realize how effective this method is.
To use the clone stamp tool, select the tool from the menu or press S. Make sure that the sample drop down is set to All Layers and then hold down Alt and click to sample an area. When you release you can now paint with cloned areas of the image. If you struggle with this area then take a look at the video above and keep on practicing.
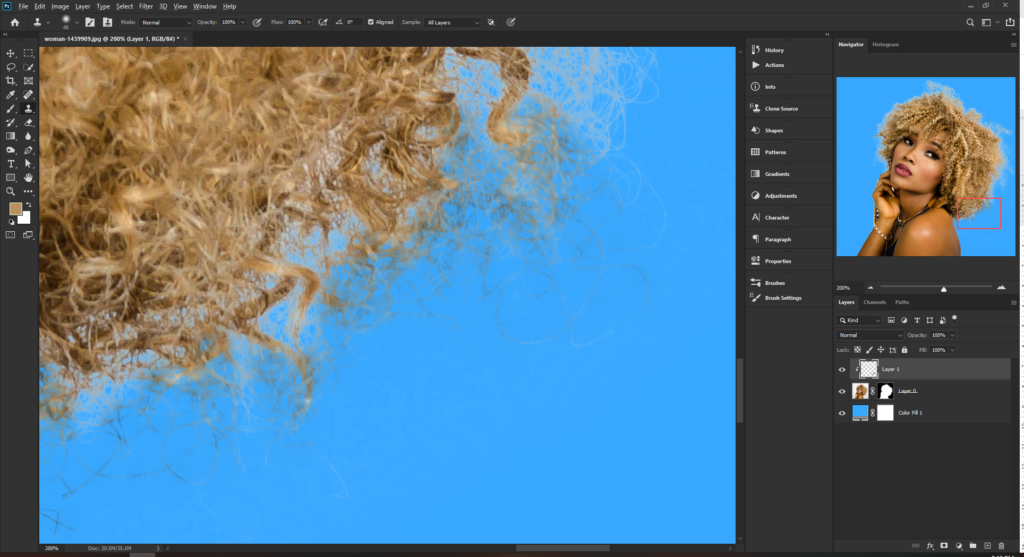
Once you have painted around the entire edge with the clone stamp tool you can see that the subject is pretty well isolated from the background. Change the bright background color to see of there are any areas which needs editing.
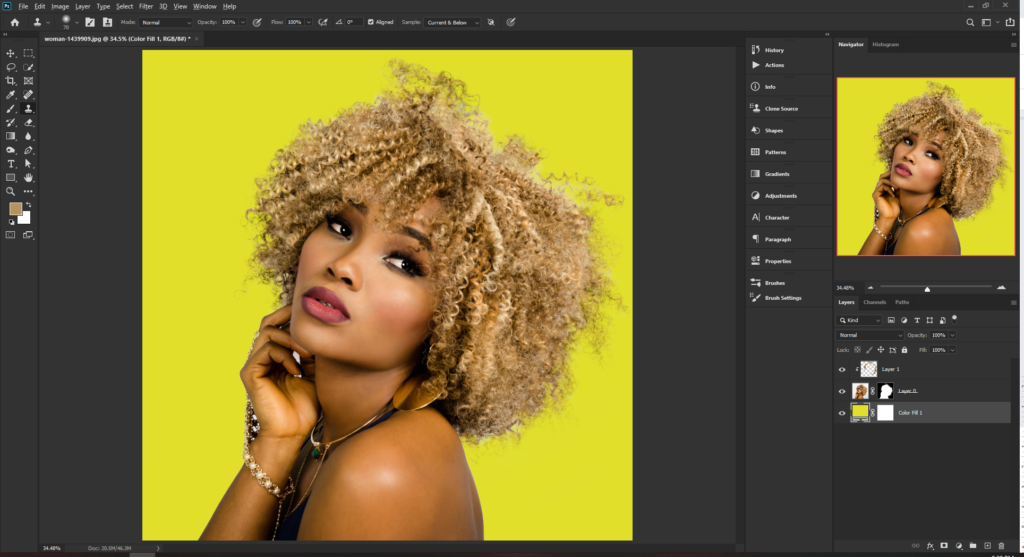
In this case it looks very nice and we have a good isolation.
I hope you found this tutorial useful and can use this technique to use on future projects. I never saw the brilliance of channels for quite a long time and now would not go back. Relatively simple to use and extremely effective Now Go Create Something!