Have you ever wanted to cut out pet hair in Photoshop but found it too difficult? – Yep, me too until I took the the time to understand the best ways to do it. In this tutorial I will go in to detail on how to approach this and as always there is a video to go along with the steps
In summary, I will be using the select subject tool within Photoshop, applying a layer mask, creating a custom dog hair brush to cut my subject out and applying a clipping mask to eliminate unwanted background color (fringing).
In this video, the subject is my dog Arlo – He appears in my videos a lot 🙂 so let’s get started
Step 1 – Cut out your selection
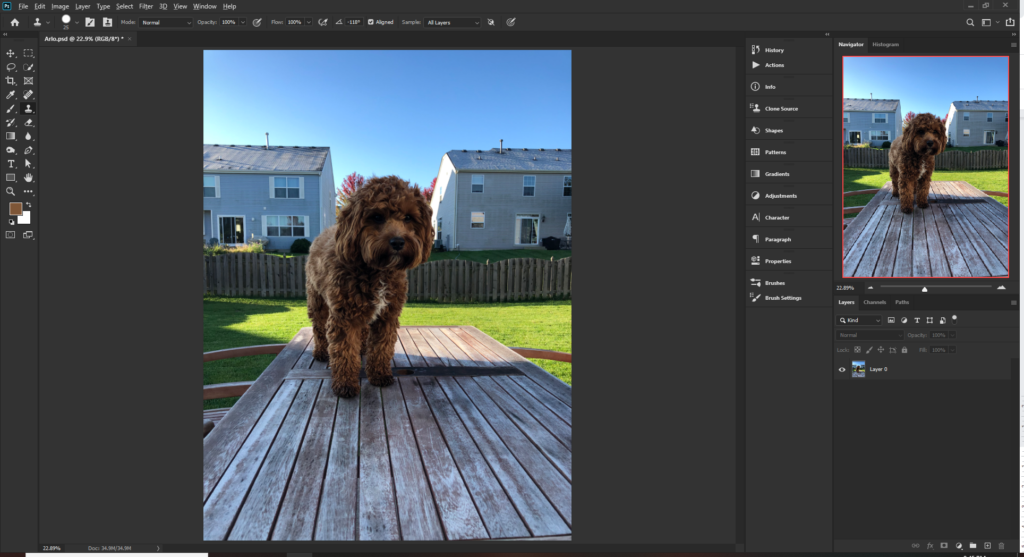
The first step is to make a rough selection of the subject. In 2018 Photoshop CC introduced the select subject tool which should always be one of the first things you try if there is high contrast between your subject and the background. For more complicated images with less contrast between subject and background it will not be as effective but always worth a try. In terms of workflow i have a particular order I try when trying to isolate a subject:
- Channel Selections
- Select Subject Tool
- Pen Tool
- Quick Selection tool
As you get more proficient with each tool you will get better at using them and quickly identifying the right tool for your task
As my image has good contrast between subject and background I will try the select subject tool. Typically when cutting out hair or fur your best friend will be the channel selection method. In this image it will not be as efficient due to the fence – I will quickly demonstrate
This method may seem pretty confusing initially but once you get the hang of it then you will love it. Open the channels panel and view the RGB, Red, Green and Blue channels. Click on the thumbnails in turn and see the differences between each layer. Go through each channel and what you are looking for is the biggest contrast between your subject and background. For my image it is the blue channel
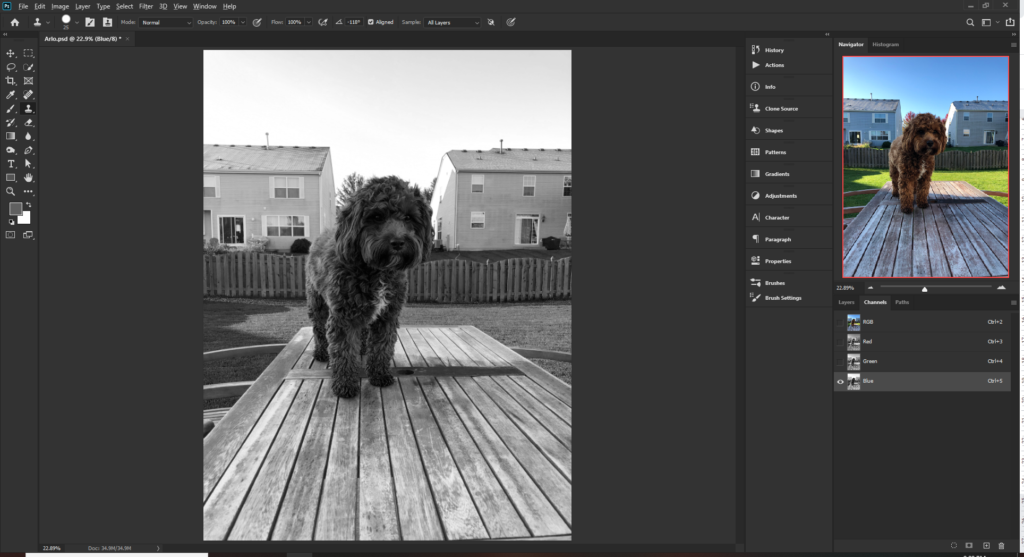
Important step – Make a copy of your channel by right clicking and selecting duplicate channel (press OK) or drag the channel to the new layer icon at the bottom of the screen. If you do not make a copy you will be editing the original image and we never like to do that.
Now we have the copy, select Ctrl+L to adjust the levels of the duplicate channel.
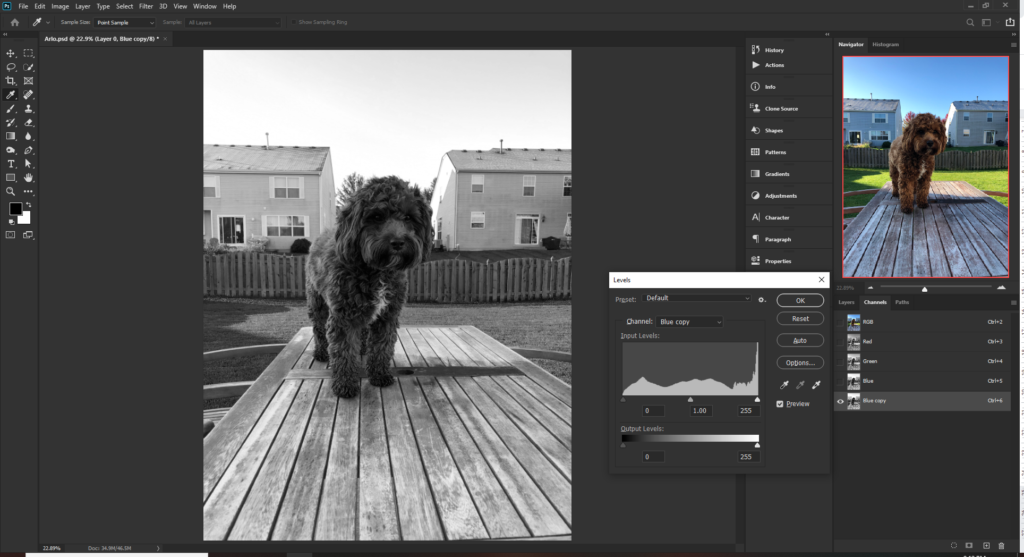
Next you want to adjust the sliders to make the white parts whiter and dark parts and darker to try and create as much contrast as possible.
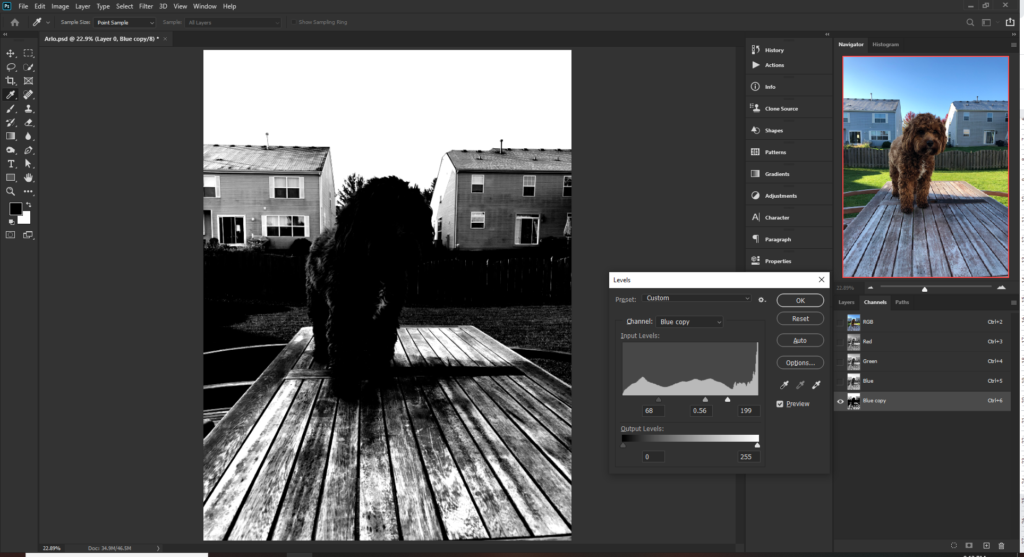
As you can see in this image it is not suitable so we will delete the duplicate channel and save this method for a future video. So lets try the select subject method.
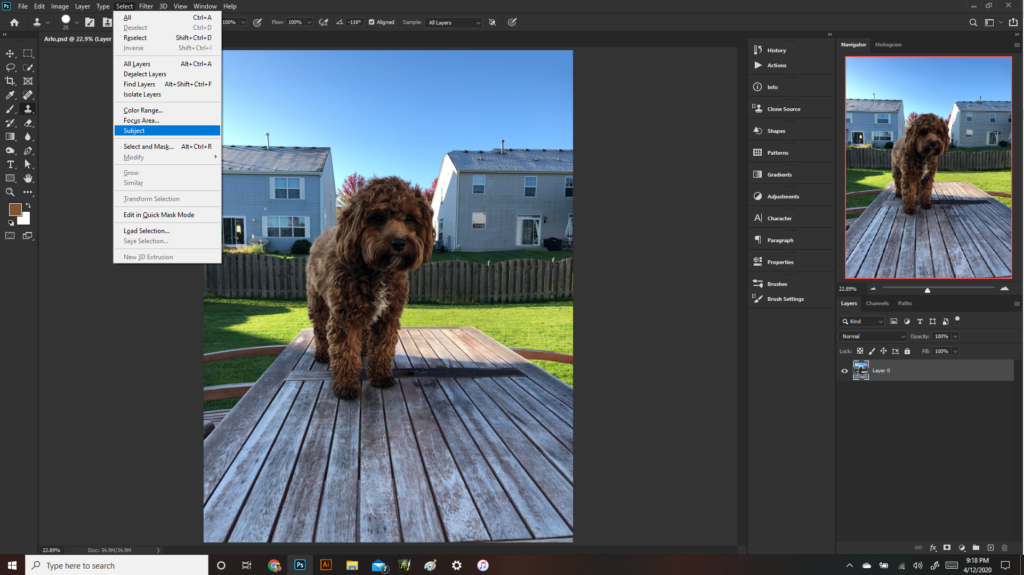
With the image layer selected click on Select > Subject
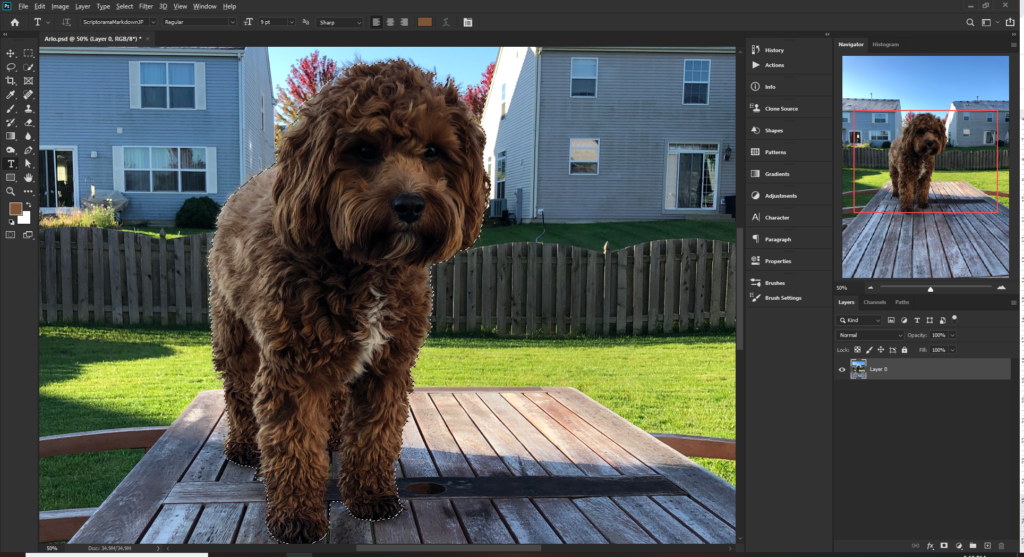
Step 2 – Adding the Layer Mask
The selected subject is pretty good so we can hit the layer mask icon. There are some areas which we will need to deal with but a very good start.
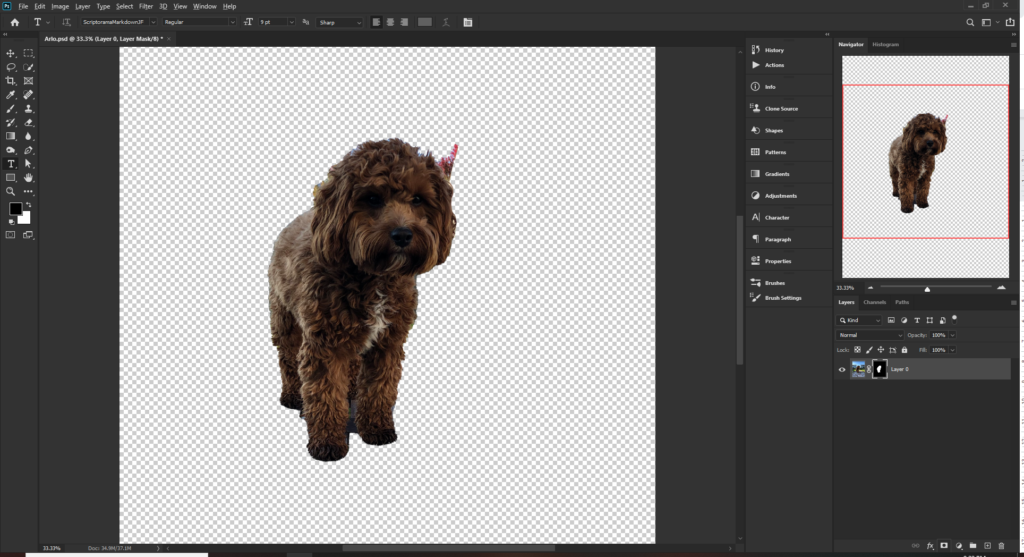
Now we are working with the layer mask we must remember a few things and few helpful commands which will help you out:
- Layer masks allow you to hide and reveal areas of a layer making the contents below visible or invisible
- To make areas of your layer visible, paint white on the mask
- To hide areas of your layer, paint black on the mask
- Holding Shift while clicking the layer mask thumbnail will disable the mask
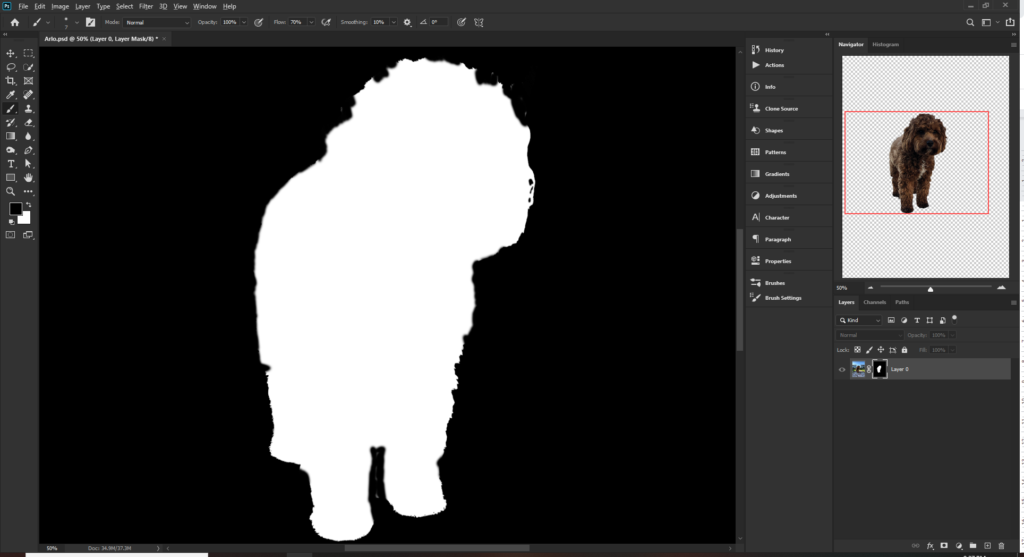
- Holding Alt and clicking the layer mask thumbnail will show you what the mask looks like
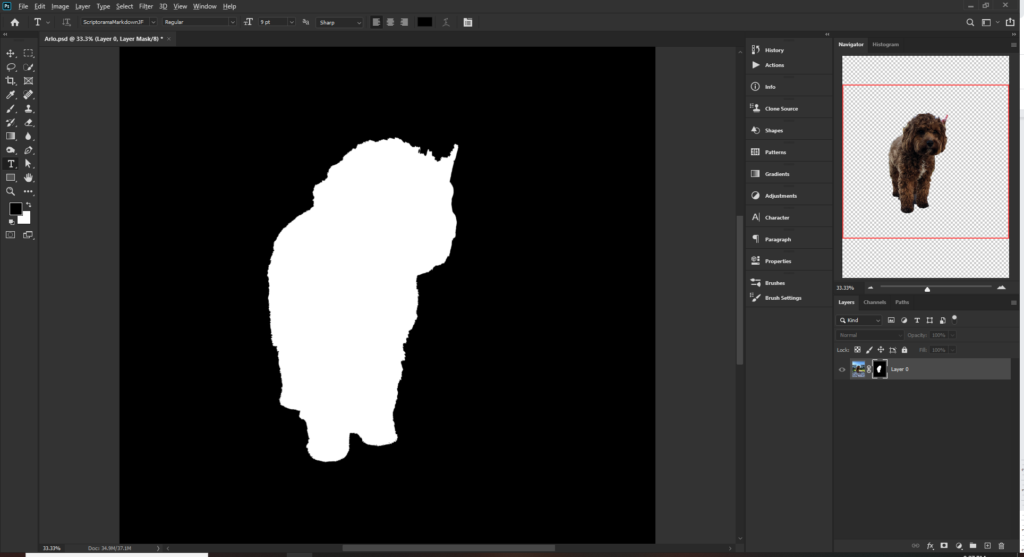
Arlo looks like a unicorn at the minute and while very cool – we will need to fix him but it does give me an idea for a future video 🙂
The next step is to paint out all of the visible parts of the background. Remember this is the layer mask only so do not be afraid to take parts of the fur away – That will actually help with this method.
So with a small, soft black brush, paint on the mask to remove the unwanted background. Think about the background like damp in the walls of your house. You have to get it all out and sometimes you have to take the good parts out to make sure it’s gone.
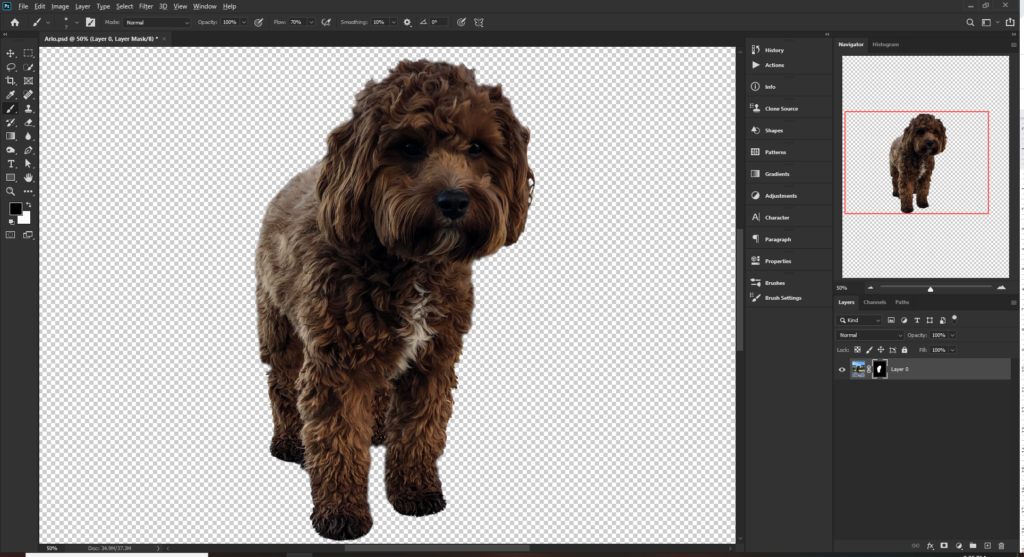
Already the cut out is starting to look OK but he has started to lose his fluffiness and the image is losing authenticity. Take a look at the mask again and you can see that there are too many hard edges to look effective but we can fix that.
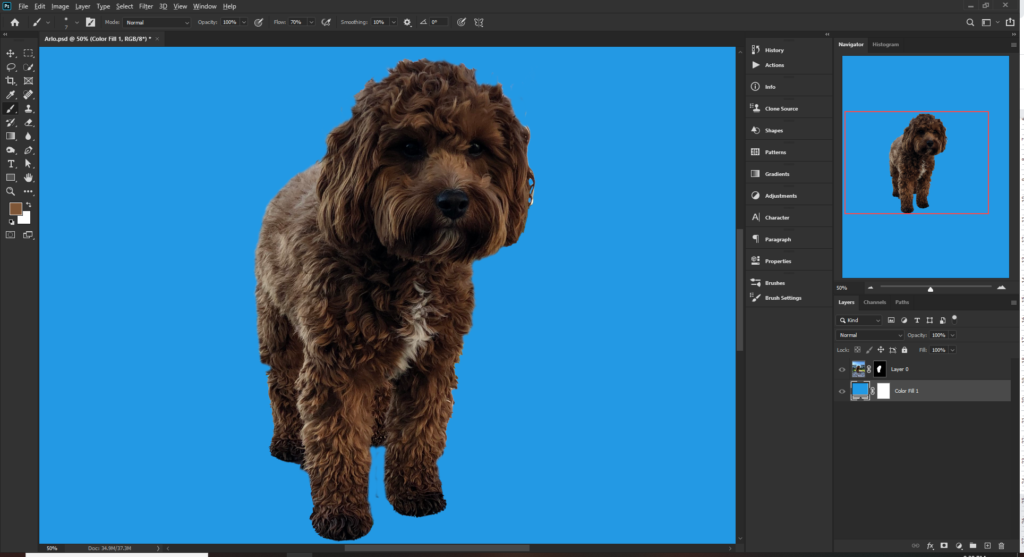
Placing a bright solid color layer behind your image will also help identify any areas which need attention.
Step 3 – Using custom brushes to cut out the fur
The next step is where we use an excellent method for making selections look super realistic. You will also start to see how much skill and effort is required to achieve this. Sometimes in Photoshop there are really quick ways to do things and other times, you just gotta grind it out in order to achieve the best results. Isolating images (particularly hair) is one of those times and it is the difference between a good isolation and a great one.
This is easier than it sounds but we will be creating a custom brush which resembles fur and then using it to go around the edge of our image. Zoom in to the image and using a very small brush on a new layer, begin to copy the strands of hair. Note – I am using a Wacom graphics tablet which really does make this process easier but not impossible if you are using a mouse.
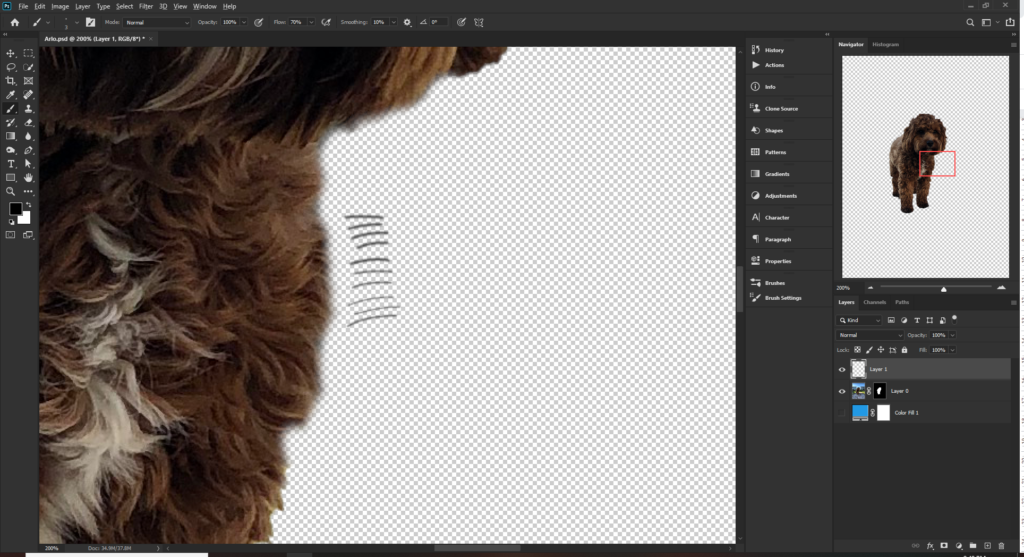
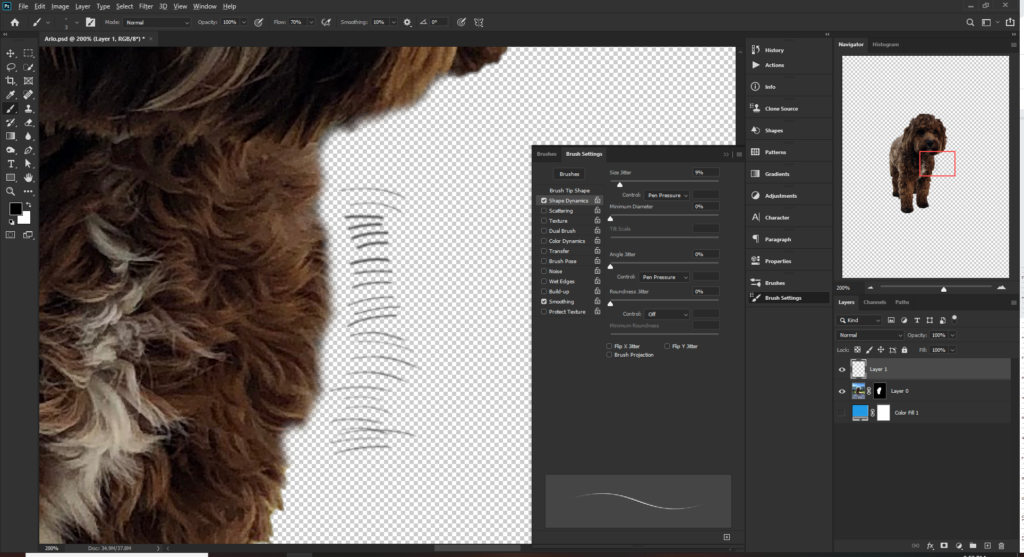
I am using a 3 pixel brush at 0 hardness. It does not look very realistic so we need to adjust the brush settings to make it look more fur like. Open the brush settings panel and select shape dynamics setting size jitter control and angle jitter control to pen pressure – This will taper the ends of your stroke like natural hair does
Next go to transfer settings and select the same for Opacity jitter control and Flow jitter.
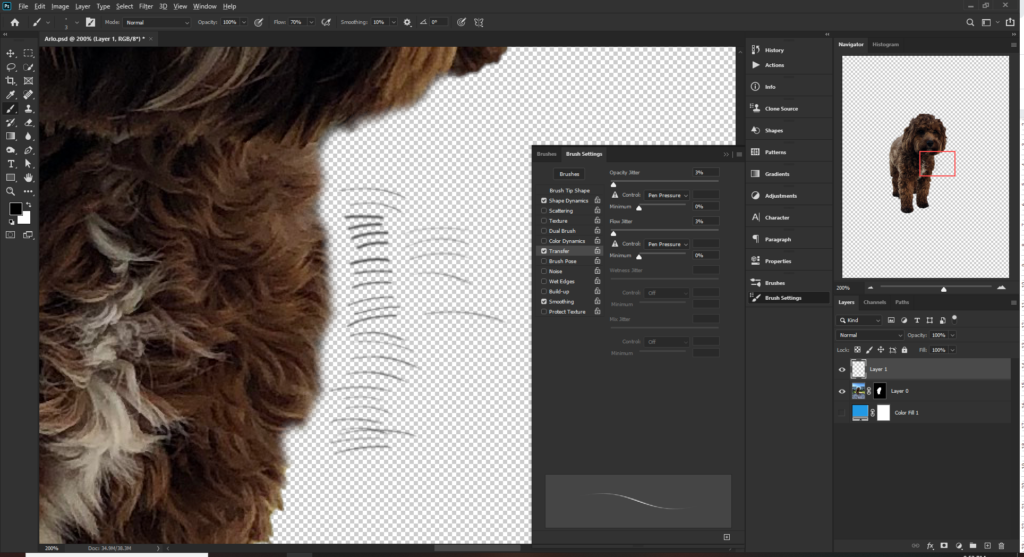
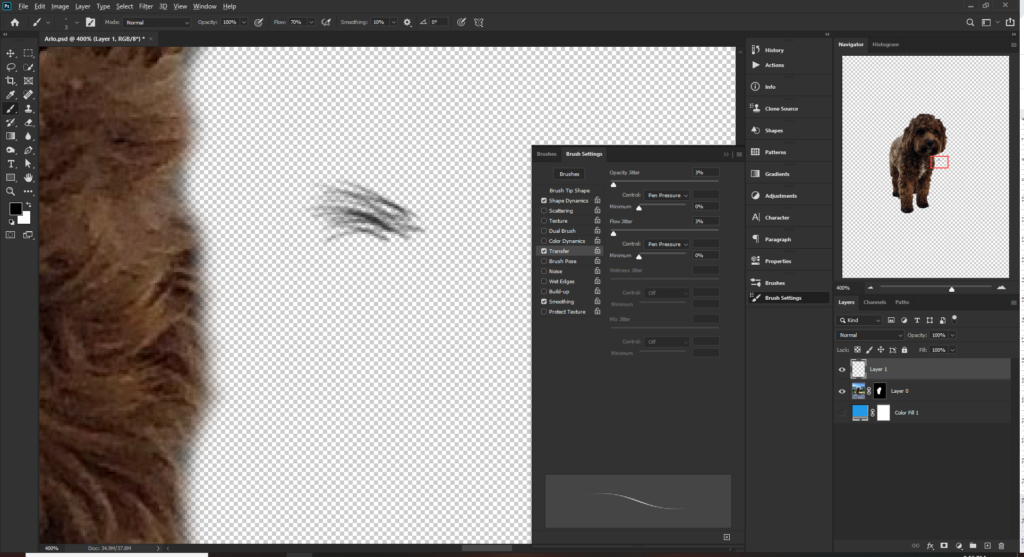
With these settings you can now use the brush tool to create a tuft of hair which we can create a new brush from.
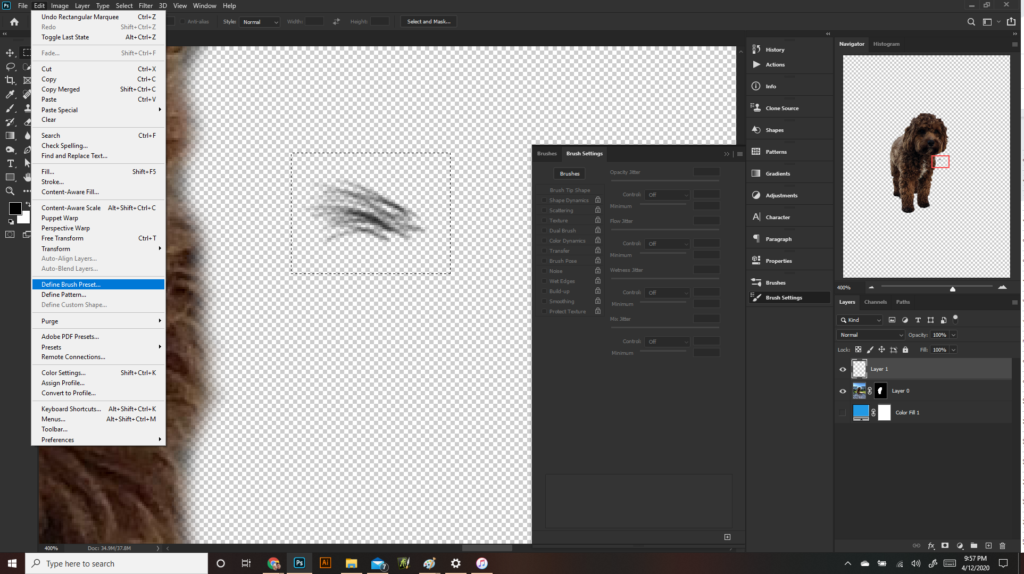
To make a custom brush we must have black marks on top of a white layer. Using the marquee tool, draw a rectangle around the fur then go to the edit menu and select Define Brush Preset.
Give you brush a name.

We now have a new brush but when you paint with it you see we still have work to do.
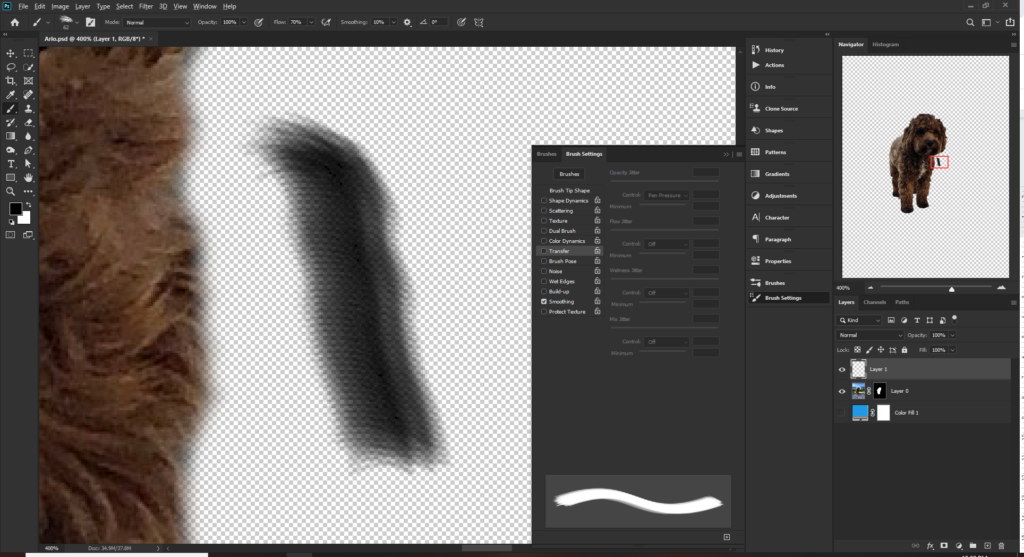
In the brush tip shape panel, adjust the spacing to about 60% – This will allow us to see the individual strands and we can see it starting to take shape now.
In shape dynamics, set the size jitter control to pen pressure. Set angle jitter to about 10% – this will alter the angle at random giving us a more realistic hair effect.
Select the scatter panel and set scatter to about 25% and count to 2 and we have a pretty good fur effect.
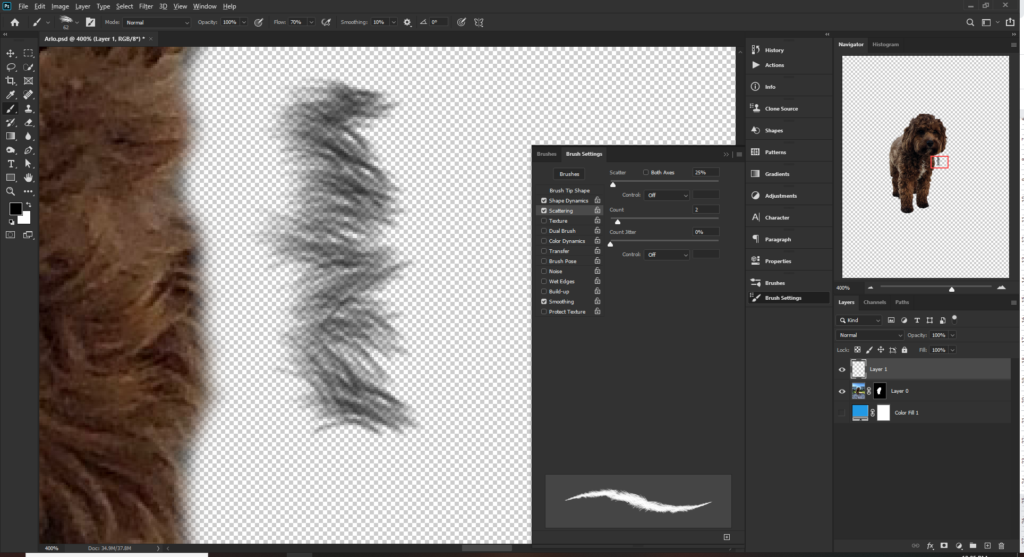
We will now use this brush on our layer mask to give a much more realistic effect.
Turning our solid color layer back we can adjust the density of the layer mask In the properties window – this will allow us to see the original image and help us to see the fur edges.
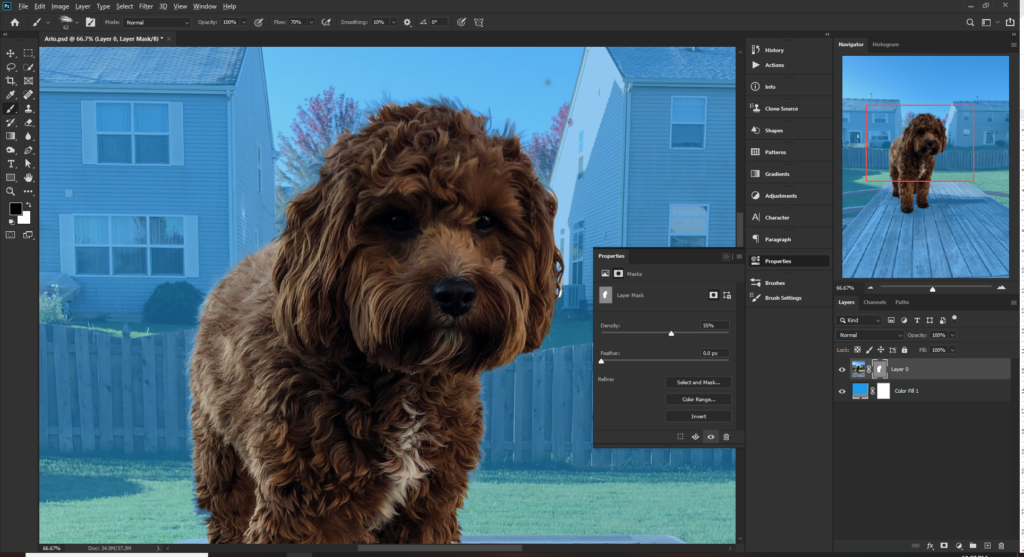
Before you start take another look at the layer mask before you start (alt and click the thumbnail.
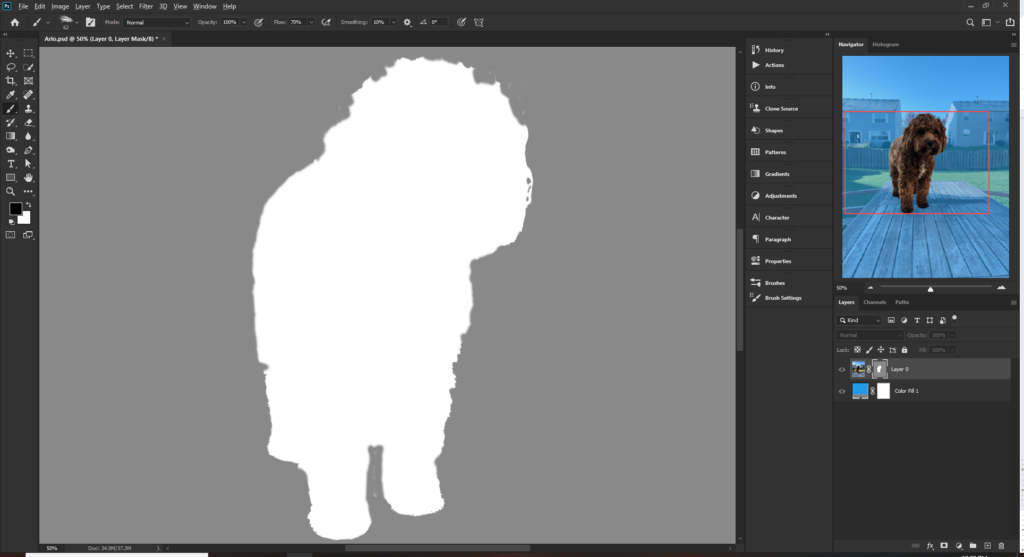
You can even keep the layer mask view up to paint and you can see the difference the brush is making on the mask with a much more realistic effect. Creating these types of masks is a wonderful thing and you will learn to appreciate the intricacy of a complex layer mask
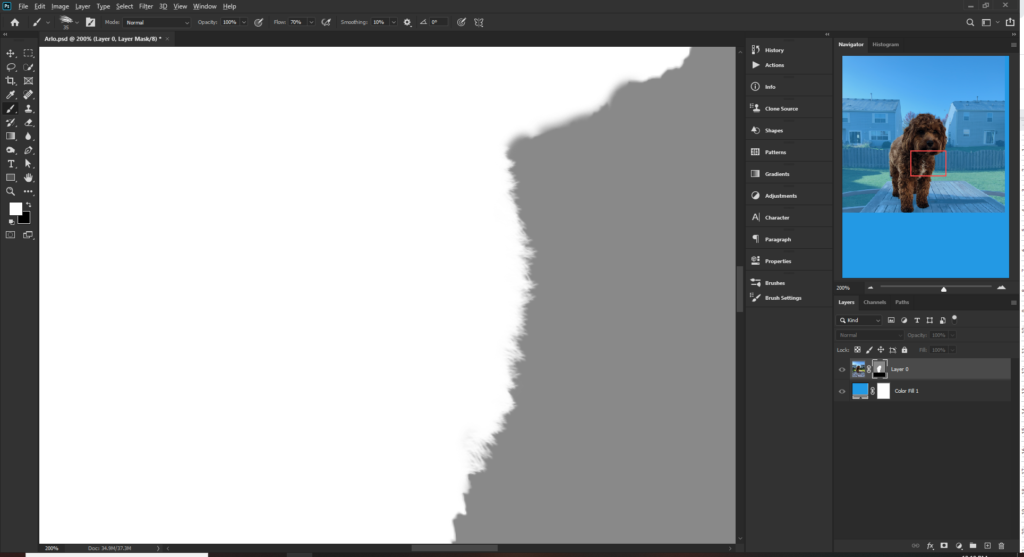
Carry on painting adjust the brush angle rotation with the direction of the fur in the image.
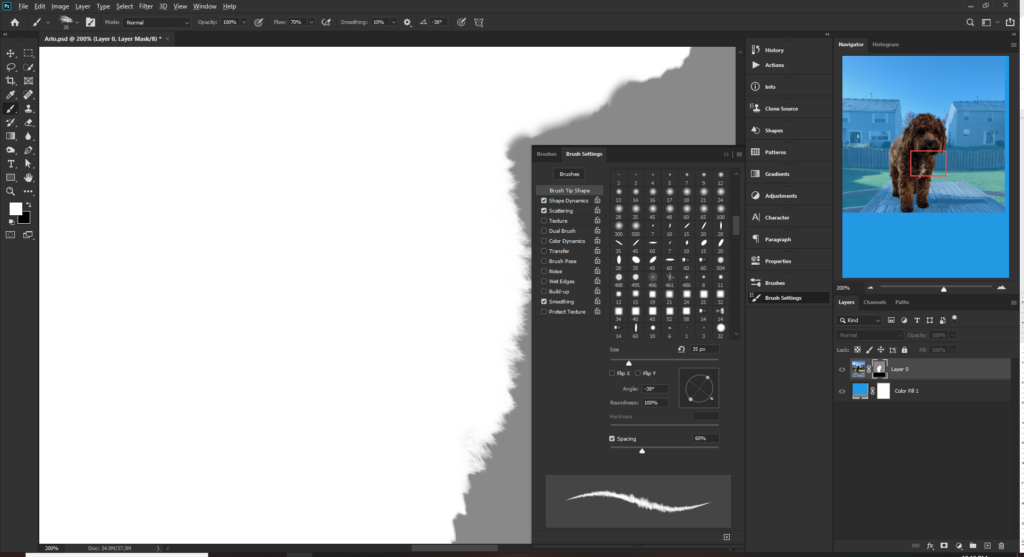
Once you have finished brushing around the edge, take another look at your layer mask to see the difference this technique has made.
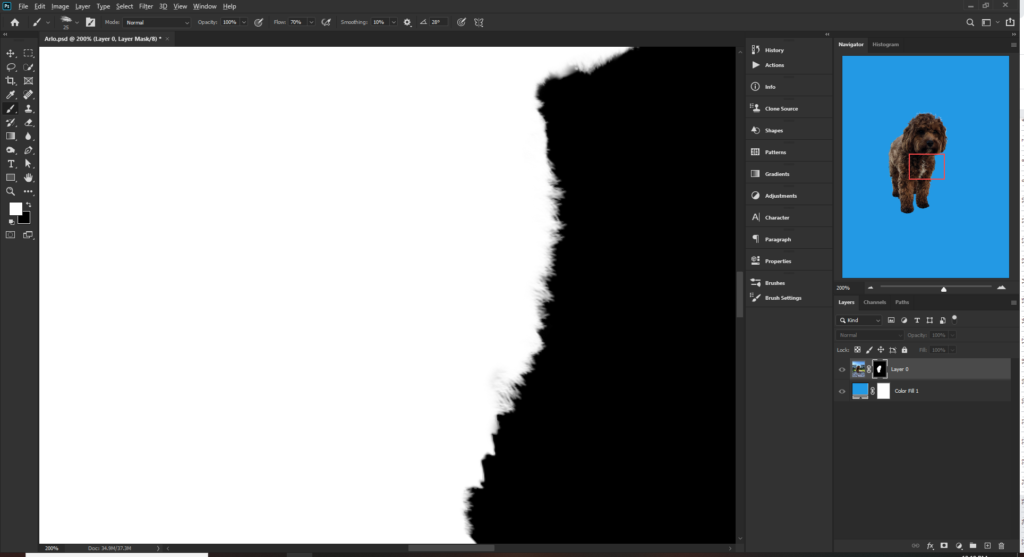
Step 4 – Use a clipping mask to eliminate fringing around the edges
In trying to get a realistic edge you may have introduced some of the background back in to the image (this is known as fringing)
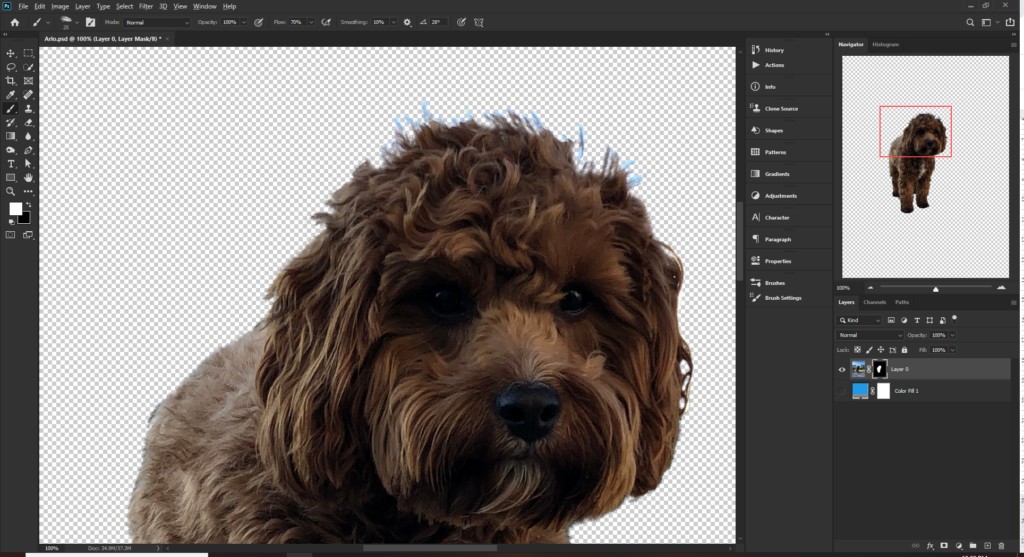
This is not an issue as we can create another layer and create a clipping mask which will limit the contents of this layer to the layer below. Since we have already created the mask we will on be painting over the selection.
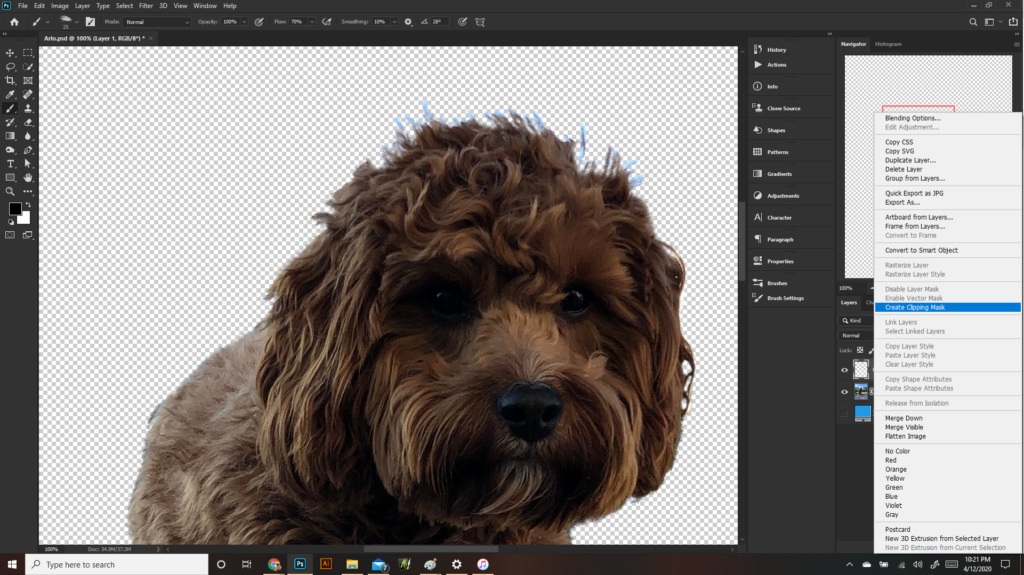
You can either use the brush tool sampling the surrounding colors or you can use the clone stamp tool to give a more realistic effect. I will use the brush tool in this example as the areas is relatively small
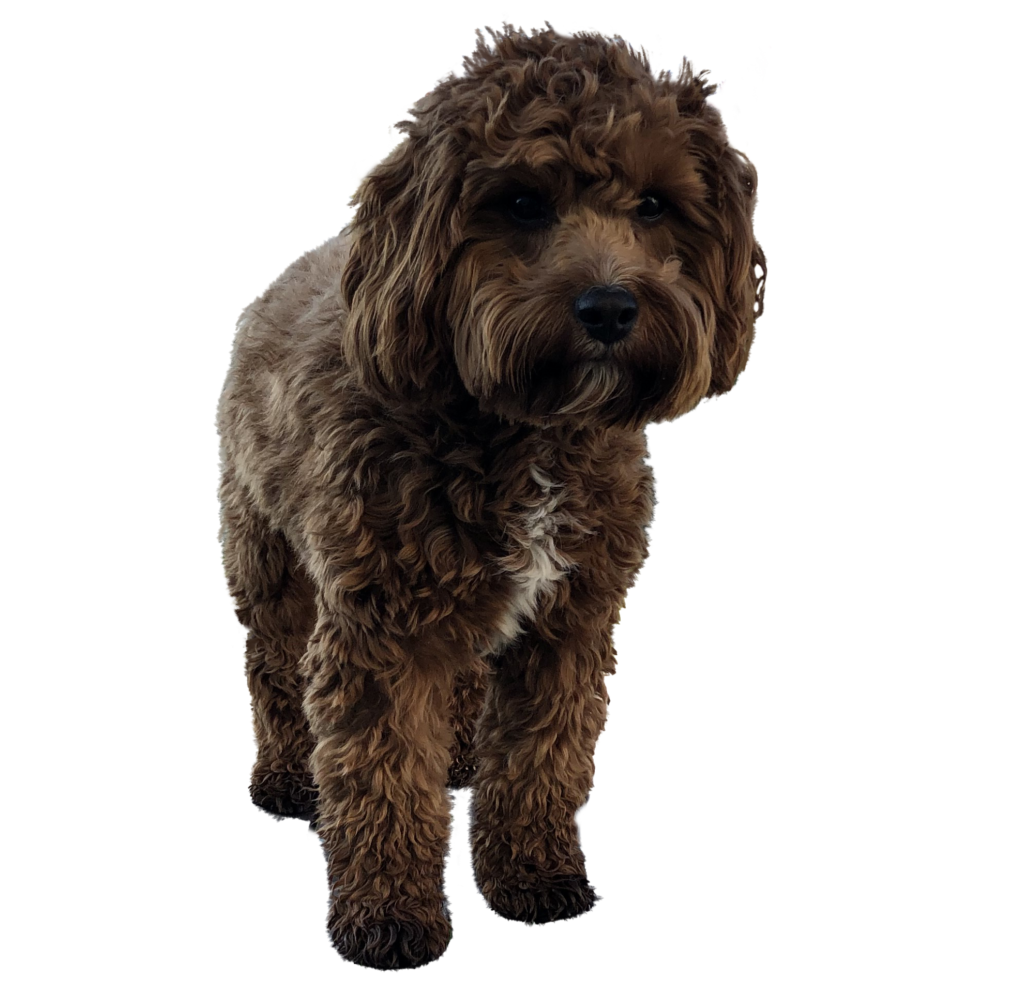
The image is now complete and hopefully you have found this tutorial useful. When I first learnt this technique I was surprised at how much work goes in to it to make it look realistic but now appreciate that level of work and can really notice the difference when the effort is applied. The secret is to realize that you need to create a custom brush for each of your images to achieve that hyper realistic effect
Look out for my next post which will be similar as we tackle cutting out complex hair for backgrounds.
Now Go Create Something!